Saturday, September 22, 2018

Part 2 The Reveal of the Concrete Pumpkin Pots

If you haven't read Part 1 on how to make Concrete Pumpkin Flower Pots, click on the link below to read instructions on how to make yourself a concrete pumpkin flower pot.

If you are coming here from the website Hometalk, welcome.  You can follow Gear Acres through a reader or Google+.  My posts are generally on how to fix something or how to make something.  We are currently restoring a 1926 home so feel free to follow along.


The pots are almost dry and were ready to plant with the small mums  plants.  Autumn and Halloween both in one item.  The photo below shows the pots in the Halloween position.
I am currently using the pots in their autumn position which is a plain pumpkin.
The pot looks perfect next to the concrete solar lamp that I made in the spring for the Quikrete One Bag Wonder contest.
Here is one of the two pots in the Halloween position with the jack o'lantern showing.  Both pots have a plain side and a carved pumpkin side.  

I like my Halloween decor to be less obvious and that is why I chose to add the cement palm reading hand in the photo below.
If you are wondering where I purchased this cement hand,  I purchased this one off of eBay about a year and a half ago.  I checked  today and I couldn't find a concrete/cement hand but there are porcelain and resin hands currently listed on eBay.
I love the details on the hand which are quite intricate for cement.  My guess is that this was made out of a mortar mix. 

But back to the pots.  Picking up where I left off yesterday.  After you remove the pumpkin basket from the outside of your concrete pumpkin you will still need to remove the plastic flower pot that formed the inside of the  concrete pumpkin and also the wooden dowel that was used to formed the drainage hole.
I tried lifting the pot straight up and out but ended up folding it in on itself and then lifting up.  This left the dowel in the concrete pot and I used a pair of needle nose pliers to grab it and twist and pull up at the same time and it slowly came out.  Go slow because the pot is not cured or totally hard at this point.
The only thing that I would do differently is to check the inside of the plastic basket to make sure it was perfect.  The plastic pumpkin basket is formed using an injection mold method and this one had excess plastic inside the plastic pumpkin.  This is not a big deal if you are using it as it was intended which is to use it as a basket to hold candy.  
But because of this excess plastic that was molded inside the mold it showed on the outside of the cast concrete pumpkin.  It is hard to see in the photo above but notice the area towards the top and middle.  Because of this it left a void in the concrete pumpkin that you can see in the photo below.
It actually isn't a big deal because it doesn't show when the pot is in use but if I had it to do it over I would check the inside for excess plastic.  My plastic pumpkins can still be used to make more concrete pumpkins.  All that I would need to do is tape up the sides with duct tape and repeat the steps found in Part 1 Concrete Pumpkin Flower Pots

I had fun with this project.  It didn't cost a whole lot nor did it take a lot of time.  With the help of an adult this project could also be completed by a child.  

You can also paint the eyes, nose, and mouth  with black craft paint if you want the jack o'lantern part to be more visible.  I might do that next week after the pumpkin dries out a little bit more.
I found the nursery receipt to show you that I had indeed only spent 22 cents on my two mum plants.  Sometimes I read other blogs and I find their project cost to be kind of unbelievable so I felt the need to show proof that I did indeed only pay 22 cents.  But even at the sale price of $3.99 the mums were a good deal. 

 My Cost

2 plastic pumpkin baskets $2.12
2 mum plants $.22
dowel already own or you could use a pencil
concrete mix left over mix from another project
My total cost $2.34

Your cost if you pay the sale price for mum plants w/o rewards bucks $8.46
Pumpkins baskets $2.12
1 40lb of Quikrete $4.05 
Pencil in place of the dowel
$8.46 (mums) + $2.12 (2 pumpkin baskets) + $4.05 Quikrete $14.63 Total

Tools needed
Drill motor
Drill bit that is the same size as the dowel/pencil
Utility knife
Scissors
Sandpaper
Needle nose pliers
Hand shovel or scoop
Container to mix concrete 
Water

Reuse Repurpose Recycle


Friday, September 21, 2018

Part 1 Concrete Pumpkin Flower Pots

Part Two The Reveal of the Concrete Pumpkin Flower Pots

If you are coming here from the website Hometalk, welcome.  You can follow Gear Acres through a reader or Google+.  My posts are generally on how to fix something or how to make something.  We are currently restoring a 1926 home so feel free to follow along.

Back in the spring of this year, I bought a 40lb bag of Quikrete to make a solar lamp for my entry into the One Bag Wonder contest by Quikrete.  I didn't use all the concrete dry mix so I stored it in a plastic storage bin that had a snap on lid.  BTW I love storing the mix like that because it stayed fluffy and didn't get hard lumps that high humidity can cause.
I like the look of concrete as a material for outdoor accessories like the solar lamp that I made for the contest.  So I have been looking for items that I could use as a mold to make two decorative pots for two small mum plants to use in my fall decor outside.  I specifically wanted pumpkin shaped pots but all the items that are pumpkin shaped on the outside are not pumpkin shaped on the inside.

I decided to look at faux pumpkins while I was buying bird food at Walmart.  Other shoppers must have thought it was odd that I was concerned with what the inside looked like because most people buy faux pumpkins based on the outside appearance.  Then I noticed the plastic pumpkin shaped baskets that kids use to hold their candy when they Trick or Treat.  I picked up one and looked inside and oh my gosh it was pumpkin shaped on the inside BUT it also had a jack o'lantern face impressed on one side.  Bummer.  I put the pumpkin basket down and walked away.
Then the light bulb finally went off.  Just turn the pot around so you can't see the jack o'lantern face.  Then the really big light bulb went off and I realized that these pots could be twofers.  Both Halloween and Autumn.  I could use the jack o'lantern side during the week of Halloween and the other side the rest of the time.

The absolute best part is that there were two different faces and the pumpkin baskets were just a buck each. I would only be out $2.12 if my idea didn't work out.  

The next day I stopped at my local nursery because they had mum plants on sale.  I was really hoping to only spend 10 bucks or less on the two plants.  I found two plants in the smaller size that would work with the size of my pumpkin pots.  They were regularly priced at $4.99 but marked down to $3.99 each.  Eight bucks for 2 plants plus the $2.12 for the pots would mean that this project would come in at around 10 bucks.

This particular nursery chain offers reward bucks once or twice a year based on how much you purchased during the year.  I always use my reward card but I didn't realize that the reward bucks were being paid out that week.  The cashier swiped my card and rang up the two plants and then asked me if I wanted to use my $7.77 rewards bucks on this purchase.  Well of course.  The new total was now 22 cents!  Using those rewards cards do pay off.
The next day I started making my pumpkin pots.  I test fitted the plastic flower pot that the mums came in because I want to use those pots to form the inside of the pumpkin mold.
The test fit showed that I needed to open up the top of the pumpkin basket so the the plastic flower pot would fit.  I used large scissors to cut the handle off and to cut the plastic and make the opening bigger.
Once the opening was the correct size I then drilled a drainage hole in both the pumpkin basket and the plastic flower pot.  The size of the drainage hole is the same size as a wooden dowel that I use for plugging holes in wood slats last month.  

This dowel will give me a drainage hole in the concrete pot and also held the plastic pot in place while the concrete cured.  I then taped up the factory drainage holes in the plastic flower pot.
I mixed just enough concrete to fill the bottom of the pumpkin but still expose the dowel so that I could fit the plastic flower pot onto the dowel.
After placing the plastic flower pot onto the wooden dowel I mixed more concrete and started to fill the void between the plastic pumpkin basket and the plastic flower pot.
  
This part is easier if you have another person move the plastic flower pot to the side so you can pour the concrete mix.  I used a hand spade to scoop up concrete mix and spoon the mix into the pumpkin mold.  Then my husband came home and I had him hold the second plastic flower pot to the side so I could pour the concrete mix instead of scooping it.
The plastic pot wanted to float up so I placed a concrete brick to hold down the plastic flower pot while the pumpkin mold concrete cured.  And the last thing you do before you wait 24 hrs for the concrete to set up is to tap the pumpkin with any tool you have on hand or even your hand.  By tapping it helps the mix to fill all voids and get rid of air bubbles.
24 hours later I started the un molding process.  This would mean cutting the plastic basket so I used a utility knife to make the cut down each side of the plastic pumpkin basket.  I used the crease in the plastic pumpkin basket as the place to cut because I was hoping to reuse these molds to maybe make more flower pots and this area would be less visible.
After I cut down each side I found that I did not need to cut across the bottom as long as I cut just the transition spot from vertical side cut to horizontal bottom cut. This allowed me to peel the mold off the concrete pumpkin.
Now that the concrete pumpkin pots were out of the molds I tidied up the top edge with sand paper and then left them upside down for another 24 hours to fully cure.

Materials needed

2 plastic pumpkin baskets $2.12
2 mum plants $.22
dowel already own or you could use a pencil
concrete mix left over mix from another project
My total cost $2.34

Your cost if you pay the sale price for mum plants w/o rewards bucks $8.46
Pumpkins baskets $2.12
1 40lb of Quikrete $4.05 
Pencil in place of the dowel
$8.46 (mums) + $2.12 (2 pumpkin baskets) + $4.05 Quikrete $14.63 Total

Tools needed
Drill motor
Drill bit that is the same size as the dowel/pencil
Utility knife
Scissors
Sandpaper
Needle nose pliers
Hand shovel or scoop
Container to mix concrete 

Water

Tomorrow
Part 2 The Reveal of the Concrete Pumpkin Pots

Reuse Repurpose Recycle

Sunday, September 16, 2018

Oh My...More Demo of Game Room Ceiling

Today's demo has revealed so many 'DO NOT DO THIS' moments if you are building a roof. 
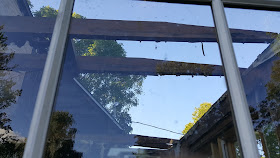
This photo was taken from the outside looking through the window.

First let me recap just to refresh your memory.  R removed 4 layers of rubber membrane and 4 layers of Homosote from the roof only to reveal a layer of cedar shakes.  Once that layer of cedar shakes were removed, he found another layer of cedar shakes.
We removed the ship lap that was the sheathing for the roof and found that the original rafters were somewhat rotted and did not have enough slope to drain properly.  So someone had added more rafters but did not use hangers to attach to the house.  The lack of hangers and the weight of oh let me count, how many layers......10 layers of miscellaneous materials plus the sheathing caused the newer rafters to pull away from the house and sag at the house.  The sagging caused leaking and the leaking caused additional tar to be slathered EVERYWHERE.   This is textbook cluster.
The only good part is that we salvaged some of the rafters which are Douglas fir and true 2X4's which R loves to use to make studs out of when he repairs a wall.

I finally removed all the nails from the ship lap which is also fir and also removed nails from the salvageable old rafters that were removed.  My wrists are very sore and my right wrist makes a cracking noise when I move it.  Yes, I know.....don't move it.

Tomorrow we need to buy 11 ten foot long 2X6's and 11 joist hangers.  I also want to do a fall concrete project.  My final cost is unbelievably low thanks to a store rewards program and a sale.  Gotta love that!

Also today when I went to Panera to get a green iced tea they told me it was free because I use my Panera rewards card whenever I buy something.  So using those reward cards really do save you money.  

Ebates is another way to save actual cash when purchasing online.  Ebates will send you $$ quarterly in the form of a Big Fat Check.  So far I have saved $858.51 by using Ebates when I purchase online.  

Use this referral and I get a reward and you get $10 in the form of a gift card once you spend $20 while using Ebates.


Some of the stores available for savings at Ebates are eBay, Etsy, Lowes, and several thousand other stores.  Sign up now so that you are ready for your online holiday shopping.

I also use, the handy Ebates Cash Back Button found under Help, then click on More features, and finally click on Ebates Cash Button.  This puts a tiny E up in the top right corner of your screen (same area that the P for Pinterest is located at) and it will remind you when you are visiting a website that gives rebates using the Ebates program.  

And when you are not saving $money$ remember to 
Reuse Repurpose Recycle

Friday, September 14, 2018

More Work on the Game Room Roof

We worked a little bit more on the game room roof demo.  Remember how R has already removed 4 layers (1 layer consists of rubber membrane and a layer of Homosote).  We both thought we were down to just 1 layer of cedar shakes. Well, we were wrong.  It turned out to be 2 layers of cedar shakes.  In total that is a lot of extra weight on that barely sloped roof.
After R removed the last of the shakes, he pulled up 16 ship lap boards that were spaced 4 inches apart for air ventilation which is normal for a cedar shake roof.  These boards have a bazillion nails in them and you know that we keep all usable lumber.  I have 6 more boards to denail and each one took 20 minutes.  

We will reuse these as floor sheathing once we level the sloped roof.  Once that is leveled we can start installing the roof rafters to mimics the roof that is already in place.  The first rafter will take the longest as we need to figure out the angle etc.

I think we will hire out the asphalt shingle install because we have a friend that does that for a living and he can do the entire job in one afternoon or we can take a week.  It just makes more sense because outside work time is running out......FAST. 

Those of you that have followed my blog from the beginning might remember that there used to be a PGA tournament called the Buick Open at the golf course behind our house.  It was a week of craziness with people peeing in my shrubs and driving across my lawn.  This week the PGA Senior Tour Ally Challenge is in town.  So far so good. None of our neighbors are allowing parking so that is keeping the crowd away from our area.  

The only bad part is that the traffic is horrible.  They were at a dead stop in front of our house and so we couldn't leave.  Saturday will of course be busier but I have to remember that at least it is not a hurricane even though it looks like a hurricane blew the roof off of the back of the house.  

I hope that Florence moves back out to sea and the residents of the Carolinas can get back to normal.  Weather can be very dangerous and nothing scares me more than water/flooding.

Reuse Repurpose Recycle


Wednesday, September 5, 2018

Rooting Broken Sedum Stems

I have a lot of sedum planted around my yard.  The reason I use so much of it is because it is basically indestructible.  In some areas of my property I have clay.  That was one of the reasons I planted sedum Pure Joy under my platform bird feeder.
Actually all three of those plants are my go to plants.  They can handle the clay and the black walnut trees.  The sedum is a sturdy plant but it never fails that I break off a few little branches during the transplanting.
  But I have found that I can take those pieces and grow some more sedum.
First off remove any of the bottom leaves.   Next stick your index finger into dirt that has been loosened and free of any weeds etc.  
Now stick the sedum stem into the hole and back fill with dirt.  And finally water your newly planted stem.
You will need to keep your little sprigs watered so they do not dry out. It will take several years before you have a transplant able sedum plant and because of this I usually plant in an area that is in partial shade and out of the main view of the flower bed.  But I did start these in the area right below the bird feeder because I amended the soil and it will be easy to water.
  
Now I just have to be patience.

Reuse Repurpose Recycle

Saturday, September 1, 2018

Platform Bird Feeder & Reveal Update #3

I wasn't planning on planting anything around the bird feeder until I mowed the lawn and realized that I would have to mow around the feeder.  If I make the area around trees and obstacles grass free (larger radius) it speeds up my mowing time.  It currently takes me 5 hours to mow the front and back yards on the riding mower and R takes about 1 1/2 hours to push mow areas I cannot get to with the rider.  So all that to say I planted stuff around my bird feeder.
The black walnut trees in my yard pose a problem to other plantings due to the toxicity in the roots, leaves, hulls, and stems. 
www.groworganic.com

So if I was going to plant around the bird feeder I would need to go with plants I already knew would grow when planted close to a black walnut tree.  Plus, they have to be plants that I love.  I've lost too many plants to try something new.

This time of year is the perfect time to buy plants because they are on sale.  So I decided to go to my local nursery to look around and if something caught my eye then I would buy it or them.  OK I'll admit it...I was going hosta hunting.  

Hostas were 50% off so now was the time to buy an expensive hosta.  So I started at the beginning of the hosta area, they are arranged A through Z.  Right away I found a hosta called Abiqua Drinking Gourd.  I already have one that I planted last year so it isn't mature yet.  
This particular hosta has almost round leaves that curl up to form a cup (collect rain water).  The leaves also have a waxy coating that if planted in full shade will keep the leaves blue (my other one is planted in full shade). This plant will get partial sun in the early morning and until noon or 1PM.  So this hosta will display as green.

I looked over all the pots they offered and found one that could be divided into three plants making my per plant price $3.34.

Original price $19.99
50% off -$10.00
New plant price $10.00
Divided by 3
$3.34

I washed off as much potting soil as possible and took my time cutting through the root ball.  Cut a little and then gently pull the roots apart keeping as many attached as possible.  I was able to divide the plant into 3 very nice plants.
Missouri Botanical Garden

No self respecting hostaholic would ever buy just 1 hosta.  I bought two more. They are outside and it is pouring rain so I will need to *update this tomorrow.  But I do remember something about Blueberry and the other is a large yellow hosta.  I should be able to divide those hostas into multiple plants, too.

*Blueberry Muffin and City Lights
 I didn't want just hostas so I also purchased a red cone flower called Sombrero and a lower growing sedum called Pure Joy.  It is like Autumn Joy except it will only grow to 10 inches tall and has bubblegum pink flowers.
Why cone flower and sedum?  The bees love them both and they will give me colorful blooms in late summer and into fall.  They are also drought resistant and the dried seed heads, of the cone flowers, are favorites of the finches in the winter.
On to the reveal.  I gave the post a final 2 coats of Behr Ultra White in semi gloss.  This is the paint that I use on my shutters, doors, and house trim.  I edged a circle around the post using my flat nose shovel and then removed the sod and about 4 inches of soil.  I replaced the removed soil with 2 bags of good top soil that have been sitting in my garden shed for 2 years.
I planted the three drinking gourd hostas on the back side of the post.  Depending on how big they grow I can either remove the middle one which leaves one on each side or just leave the middle one and remove the two outside hostas.

The sedum plant was planted in the front on the right side and the cone flower on the left side.  This left an open spot in the front for a solar spot light.  The solar light will highlight the bird feeder and can be seen as people drive by on the driveway at night.  Plus, our property is very very dark at night so any little pops of light helps.

I also added a wooden black cat that was at one time a door stop but I cut the door stop part off and I will screw it to the post after I buy a five inch screw tomorrow at the hardware store.
Now comes the good part.  It took both of us to lift the bird feeder high enough to slide the pole on the bottom of the bird feeder into the hole that R drilled into the end of the post.  We could have cut costs by buying a 4X4 post, but the scale of the post and that of the feeder, just would not look right.  Plus, 4X4 posts can twist as they dry out and that would look very bad.

AND then it started pouring rain so my photos are NOT Pinterest worthy at all.  But here is a before and after photo.
'Before' and as found at the curb.
'After' but before planting.

Cost breakdown

Original feeder Free @ Curb
Paint for feeder and post- Already had
Package of L brackets- $2.99
Strap Hinges- Already had
Black satin spray paint- Already had
2 feet of hardware cloth- $5.00
Screws for straps- 24 X $ .07=$1.68
Metal bracket with short length of pole- Free @ Curb
8ft 6X6 Post- $31.99
Trim boards on post- Our scrap pile
Plants Cone flower- $10.00
Sedum- $8.50
Hosta- $10.00
Black Cat- Already had
Solar spot light- Already had

Total cost for feeder, post, and plantings $70.16

We love our birds and some birds prefer platform feeders.  Also, we are hoping to attract crows to the feeder.  We have 6 crows that scavenge for dropped fruit in the afternoon.  Crows are a favorite for both of us.  It is a bit unusual because some people do not like them at all.  But they are highly intelligent birds and I hear that they can be trained.

The girl who gets gifts from birds - BBC News - BBC.com

Grudge-Holding Crows Pass on Their Anger to Family and Friends ...


From a design standpoint the feeder was already designed and constructed.  I disassembled the feeder and reassembled using glue and screws and eliminated the plywood bottom and replaced with hardware cloth.  I painted the feeder using the same paint that the house is painted with and added design elements that mimicked those on the house, in the hope that the feeder would look original to the house and not something purchased at the store in 2018.  The plants also repeat the existing plantings in the landscape.  

And there you have it.  The bird feeder is probably a little 'extra' as they say but we love these kind of projects.  

Reuse Repurpose Recycle