Thursday, July 31, 2014

Beekeeper's jacket and another tree bites the dust

Beekeeper's jackets are a must if you intend to keep bees.  So I went to the Internet and found R a coat that included a pair of gloves.  Prices vary greatly for the same product.  The jacket I bought with the gloves was $59.00 with free shipping.  Some sellers were selling the jacket alone for $99 and the gloves for $34, so shop around before buying.

When you order a coat, order your normal size.  They run bigger to accommodate a sweatshirt or jacket in cooler weather.  During the summer you will appreciate the extra room to help keep you cool.  The coat is made of thicker cotton so that when a washing is necessary, all you do is unzip the hood and pop the jacket in the washer.

This jacket was sold with a pair of gloves.  The gloves go on over the sleeves of your jacket.  The jacket sleeve has a little loop at the cuff which you stick your thumb through.  This keeps your sleeve in place as you pull on the long gloves.  These gloves have a cotton gauntlet with the actual glove made out of a soft thinner leather so that you have good dexterity when handling the frames etc.

Where's the jacket photos??? I accidentally deleted them while trying to upload them to the blog.  My computer has been acting unusual and this is the second time in the last week that I have deleted photos.

We still need to buy a smoker and a brush.  R will be adding another box (super) on top of the current box. I also cannot wait until we can move the hive this winter.  It is currently under the bay window and we are having the window replaced but they cannot do it until the hive is moved.

The storm we had three days ago brought down another tree.  This very very large cottonwood was just outside our property on a vacant lot but fell on ours land.  So we have been busy cleaning that up and when Ryan returns for more wood he can finish off this tree.

Just when we were all caught up on our burning, too.

I don't think the photos show how big this tree really is because I couldn't find anything to put next to it for scale.  The bark is deeply furrowed.  I placed my fingers between the furrows to get an idea of the depth of the furrows and the depth went all the way to my knuckles which is about 4 inches.

The photo below show a weird piece that was dark pink to red.  It looked like blood.  I noticed that today the red was a lot lighter than yesterday.


Interesting bee fact
That's a lot of miles!!!!!!

Monday, July 28, 2014

Photo Shoot at Gear Acres

Last week my niece, Miranda, spent about 3 hours shooting bridal photos of her friend.  She is self taught and has been photographing for only a year. What did I learn from this experience?  My photos are horrible.

The first thing upon arrival, Miranda and I walked around and she pointed out the items that she wanted to use.  I helped her set up and then grabbed her little 1 year old girl for some aunt time. Farrah June is precious and getting to that adorable stage where you can interact.

Miranda shot photos both inside and outside.  It's amazing what careful editing can do.  It was an extremely hot and very cloudy day but the bride looks fresh as a daisy.  Youth is a wonderful thing.
Look....no weeds.  Love that editing.  I just wish I could edit out all the weeds in my yard.

By the end of the day Farrah was singing, waving, and throwing kisses.  As any good aunt would do....I fed her half a glazed donut, got her all cranked up on sugar, and handed her back to her mother.

Sunday, July 27, 2014

Fertilizing at The Gear

Now that we have committed to be pesticide and herbicide free here at The Gear, we have to change the way we do things.  That starts with reading labels and going back to the old ways.

Waaaaaaaay back when I bought my first house and started gardening, I used a lot of fish emulsion. As a child my grandparents always planted trees with the remains of a fish catch.  The Native Americans also used fish as a fertilizer and R reminded me that the huge oak tree in the backyard at the Torrey Road house had two large dead Oscars buried with the small oak sapling that we transplanted from the flower bed.

So fish emulsion is back on our list of acceptable products.  I used to buy it at Frank's Nursery but when they went out of business I just didn't see it again and it fell off my fertilizer radar.  I've used Miracle Grow now and again and some generic bloom fertilizers for my annuals.

My tomatoes have always been fertilized with Tomato Tone which is organic and helps eliminate blossom end rot which is a calcium deficiency that you get when you plant your tomatoes in the same spot every year. They also offer a fertilizer for acid loving plants such as holly and hydrangeas. Check out their website.  The company uses solar energy and they have a solar dashboard where you can see actual real time solar data for their company.  I wish more companies would embrace solar energy.

But back to fish emulsion.......On our trip to Tractor Supply last week I found fish fertilizer.  So I bought the last bottle they had in stock and it is already almost empty.  I'll head back to buy more and a couple of bags of cow manure.  Everything good smells bad.

If you are thinking about using fish emulsion here are a few facts that you should know.

1.  First and foremost....there is an odor, no wait....it's smells bad.  Because of this DO NOT USE ON INDOOR PLANTS.  Trust me on this one, even though the label says it's OK for indoor use. Yes, it's safe health wise but smell wise.....nope.  If I was a hash tagging kind of person I would hash tag this #smellsbad.

2.  Fill your water containers half full of water, add the correct amount of fish emulsion, and then finish filling the container with water.  This eliminates shaking and stirring which increases the chance of getting the mixture on your hands and clothes.....remember it smells BAD.

3.  Do not over dose.  It is better to under dose and fertilize more often.

Ever wonder what those three numbers on fertilizer bottles and  packages indicate?  Well, here goes.

The first number is Nitrogen which uses the symbol N.  Nitrogen promotes green leafy growth and promotes that lush green color that is so coveted in lawns.

Phosphorus or P promotes below ground growth in the form of a healthy root system.  It also helps with flower blooms and fruit production.

The last number is Potassium or K which helps builds strong cells.  This helps the plant withstand periods of stress such as hot, cold, pests, and disease.  Basically overall good health.

If you find it hard to remember what's what, try this little saying to aid in remembering what each element does to help your plants.

Up, down, and all around.
1st number, 2nd number, 3rd number
Up is the part of the plant above ground.  Down is the part of the plant below ground.  And all around is just general good health for the overall plant.

Bee news.

I've order R a coat/hood and gloves.  I still need to order a brush.  He will add a second level (super) to the hive in 2 weeks.  This second level is where the bees will store the honey needed to get them through the winter.  If the bees couponed, this would be their stockpile.  The bees seem happy and they are busy busy busy.  When you watch them, you begin to truly understand the phrase 'busy as a bee.'

Wednesday, July 23, 2014

We Bee Hiving

Today  the bee keeper showed up to help us with our swarm.  At first he wasn't too confident that we could get them to stay put after removing them but he went ahead and as of 10PM tonight the bees are staying in the new hive.  But let me start from the beginning.

Sunday we purchased the start up hive and Sunday night I primed and painted until 4am.  The bee keeper was busy on Monday in his own bee yard so we had time to run to the store to purchase 6 cement blocks to form the pedestal for the hive to sit on.  I know this isn't important but if we are to have multiple hives they must all look the same and sit level.  It would drive me nuts.

The original cement block set up was two blocks high with solid 8X16X4 inches high blocks sitting on top of the two rows of cement blocks.  Once we set the hive on top we realized that it was too high.  The bottom two layers of a hive are for the bees so the layers you will be removing are on top of that and are usually two layers.  So we removed a row of blocks after this photo was taken..
The first piece that you start with is the bottom board.
Then you set the super on top of the bottom board.  See how the bottom board juts out in front of the super?  There is a little sliver of space between the super and the bottom board which is the door to the hive.  The bees goes in and out through that space.
 The next step is installing the frames.  The frame can have a wax foundation or a black plastic foundation like these frames.  The next super will have frames with wax foundation because that is the preferred method for our bee keeper.
Here is an up close photo of the foundation.  The bees build their honey comb onto the foundation.
Everything fits just so and the frames are slightly craved out on the sides so the bees can go around the frames without going all the way to the bottom first to get to the other side of the frame.

On top of the frame you set the top cover........
and then the lid which is covered with metal for rain protection.  Notice how the lid allows for runoff by having a slight overhang.
Here is the beekeeper after he removed the wood under the bay window.  This window will be replaced with replicas of the original double hung 6 over 6 windows so removing the bottom of the bay was no big deal.  But on a side note.....look at how little framing there was to support that window.....shaking my head.
The beekeeper set up the hive under the area where the bees had started to build honeycomb.  He smoked the area to calm the bees and moved pieces of the honeycomb into the hive between the frames.  He then used a soft brush to aid in removing the bees.  Once he had a lot of the bees into the hive, he started looking at each frame looking to see if he could find the queen.  Sure enough he found her and brought the frame over to me to see (I was sitting in the car because I am allergic to bee stings).  I took a photo of the frame covered in bees with the queen (she's huge but not full grown yet).  Where's the photo? I accidentally erased it when I was uploading photos to the blog.  My computer is acting weird and my cursor for no reason at all moves up to a previous line without any warning and before I knew it, I had deleted it.

By 6pm almost all the bees were in the hive.  The beekeeper had left the lid ajar so that the bees could get into the hive from the top.  He wanted R to go outside after dark and completely close the lid.  So at 10pm R closed the lid.  He said he only saw a few bees flying around.

The hive has to stay there until cold weather and then we can move it to the back side of the barn. Until then the hive stays put.  In three weeks we will add another super with frames with the wax foundation.  That layer is for the bees to store honey to get them through the winter.

Once the hive is moved back to behind the barn, it is not guaranteed that the bees will stay there. Normally after a swarm, the bees are moved at least 2 miles so they do not go back to the original area. But I am hoping that they weren't too attached to the window area.  The beekeeper smoked the area really well after the bees were mostly in the hive.  He did this to cover up the queen's pheromones.

Bees are quite interesting.  The queen lays 2000 eggs a day and can live for 8 years.  She does nothing but lay eggs.  Drone feed her and remove her feces.  Bees do not defecate in the hive so during the winter they need to make cleansing flights to basically poop outside the hive.  When the weather is too cold some of the older bees will collect the feces and go out into the cold.  Since they are old and if it is too cold they basically sacrifice themselves for the good of the hive.  This past winter was brutal for the bees here in Michigan.  Once it got cold, it stayed cold and we had a lot of strong bitterly cold wind.

The beekeeper, believe it or not, worked with my husband and they retired around the same time. The beekeeper is the father of my daughter in law's sister in law.  So we had to talk automotive biz for a while.

Now I need to find R a smoker, a bee suit, brush, and gloves.  I'm sure there is more but this will be a learning process for us.  R is looking forward to beekeeping and the honey.

Please help the bees by no longer using Round Up or herbicides and pesticides.  Genetically engineered plants have insecticides built right into them.  Europe and Canada are in the process of banning these but here in the US we are looking the other way.  NO BEES....no fruit, no veggies, etc.  Not all plants can be pollinated by the wind, some need bees for pollination.  The beekeeper said to plant only heirloom veggies as they are safe for bees.

This is an interesting article that explains the link between colony collapse and neonicotinoids.

Tuesday, July 22, 2014

Curbside Treasurer

R is on quite the roll when it comes to finding goodies that have been placed out to the curb.
Check out this vintage trunk.

It needs some loving but check out the curved wooden straps on the lid.

It also needs some new hinges but they can be found on a variety of different websites devoted to restoration.

Hive update....hive is painted and is setting on cement blocks in anticipation of the beekeeper possibly arriving on Tuesday.  He was busy in his own bee yard on Monday.  Keep your fingers crossed that all goes well and the Queen is agreeable and her subjects follow her to the new hive.

Sunday, July 20, 2014

Swarming Bees and Our New Hive + Racing with Tony Stewart

Like we really needed another project but when swarming bees show up what can you do?

I won't lie, R and I have talked several times about setting up bee hives so that we could have honey.  R loves his honey and can go through a large bottle of honey in one month.  But we have so much on our plate right now that setting up a bee hive was the last thing on our mind.  That was until Saturday afternoon.

We've been busy weeding and clearing out the bed in front of the house so that I can start painting. Several times we have tried to plant this bed with absolutely no positive results.  The entire front of the house was completely hidden by large junipers when we purchased the house.  It was quite the job to dig and then pull out the huge stumps.  This left large holes that we filled with new top soil.  We then planted three expensive bird's nest spruce and 2 twisted junipers.  They all completely died within 3 years despite watering and fertilizing.

We then replanted with Knockout roses, coneflowers, and irises.  The Knockout roses died within a year and the irises are so so, but the coneflowers are doing great.  No more planting.  Obviously the soil is bad or it is too hot.  Who knows, but we have enough flowers on our property, so it's rocks and boulders for the front.

While we were weeding and removing poorly performing plants, we noticed the lack of any honey bees even though there were plenty of flowers around.  We continued weeding when R noticed a swarm of bugs near the far corner of the house.  The insects were flying willy nilly all over the place. It really didn't look like swarms of bees that I have seen before.  Those swarms all flew in unison back and forth, these were just everywhere in a jumble.

I went in the house and looked out the window to try and get a closer look.  It was then that I saw the honey bees.  We watched the swarm land on the seam in the shingles under the bay window in the family room. These are the windows that we are replacing because they are not original nor appropriate and were poorly installed.  The swarm, once it landed was about 12 inches X 14 inches and about 4 inches thick. Slowly the bee mass got smaller as they went inside under the bay window and soon only the guard bees could be seen flying around outside the small opening.

This seemed like the perfect time to get a hive so I checked CraigsList to see what could be found in the immediate area.  We actually found a seller who makes hives and who lives in my township and is located about 7 miles from us.  I called him and arranged to buy a new hive on Sunday evening.

Realizing that we knew NOTHING about bees except that they make honey meant that I needed a book fast.  Did I go to a book store....no.  I went to Tractor Supply Company in Fenton.  I needed to go there anyways because our tree cutter showed R this little gadget to sharpen your chainsaw blade that they sell there.  That's an entire post on it's own but they were out of the sharpener until Monday so I walked around looking at all the cool stuff.

I noticed an area of books on homesteading, canning, and raising chickens so I was hoping that I could find something on bees.  There were bee magazines but I needed beekeeping 101 for the newbie.  I rounded the corner and there it was....the last one.  The Backyard Beekeeper by Kim Flottum.
I quickly ran through the book and wow....is there a pre beginner's book?  Luckily we were able to pick the brain of the guy we purchased the hive from and that really helped.  I'll go through the steps that we are going through to set up this hive and retrieve the swarm but first I have to paint the exterior of the hive to protect the raw wood.  This has to be done before the bees are brought to the hive.  From what I read and from what I was told today the best method is to use a latex primer and paint and let it dry overnight.  It is also best to paint the hive to blend in with the surrounding so as to help it go unnoticed. The hive and hopefully hives in the future will be located behind the barn protected from the west and storms that generally come from the west and also protected from the cold wind coming from the north. Behind the barn will give the hive morning and early afternoon sun but protect it from the middle and late afternoon sun which is the hottest.

More later on bee hive set up later.

In the meantime, while dealing with the swarm, I get a text message from my daughter in law with a photo attached saying "guess who's here, it's your fav driver.  You still have time to get here."  The text message had a photo attached of a race hauler.  I didn't recognize the hauler but I guessed that it was Tony Stewart's.  My son races a winged sprint car with the traveling sprint car series called Sprints on Dirt or SOD. Tony has raced with SOD before when he has an opening in his NASCAR schedule.

We couldn't make the race but my son, G, had quite the night.  He started the feature in the 6th position outside of Tony Stewart in 5th position.  G actually passed Tony at one point but a lap later was passed back.  Tony went on to win and G finished 7th.

It was quite a night for my son.  There were articles on all the sports sites, including ESPN, because this is the first time Tony has returned to racing a sprint car after his bad accident last year that resulted in a broken leg and multiple surgeries to correct the damage.

G is in the #187 and Tony Stewart is in the #14
So now I'm off to paint the bee hive.

Friday, July 18, 2014

Another big tree bites the dust

Yup.  Tree number 2 came down on Wednesday.  It was just slightly smaller than the first one (36X32 inches) and came in at 32X34 inches.


I haven't counted the rings just yet but I did a quick scan of both trees and there is an area on both trees where the rings are very close together for about 5 or 6 rings.  Both trees show this around the 25-35 year mark.  I wonder if this coincides with a known drought like maybe in the 30's?  It will be interesting to see where this all falls when I start mapping out the rings.

My batteries in the camera were dead the day the tree was cut down so today was the first time I had a chance to take a photo.  I had R and Grandma Cat climb up onto the tree trunk so that you could have something to judge the size of the tree against.

The above photo shows the tree truck after it already had about 6 ft cut off the end of it.


We finished the clean up of tree number one and all that remains is the stump which we plan to remove in the fall.
Both of these trees were dead dead but because of their size they still offered some shade.  Now that they are gone we are noticing that some areas of the yard are getting more sun which is good but the yard looks bare if you ask me.

Thursday, July 17, 2014

Vintage Pink Oven

I love these pink appliances.  It isn't my style nor would it look good in my kitchen but I thought I would pass it along just in case someone needs a pink oven.

Here is the Craigslist link.


Wednesday, July 16, 2014

Curbside Treasure

R picked this up two nights ago about 2 minutes before it started pouring.
It's really not my style, even if it was painted and had different cushions.  I think I'll dig through my stash of glass because I might have a round piece of glass for the table top. Maybe flip it on Craigslist and buy more hostas with the money.  Keep saying to myself...I have enough hostas....I have enough hostas.
 Grandma Cat says "I did not put that dirt on the cushion.  I think R did it."

Tuesday, July 15, 2014

TIMBER!!!!

We have or had three very large and very dead trees in our yard.  Over the years we have cut down and removed many of them ourselves but we wanted these gone now.

In the past, we have cut down the trees and then cut them into fire place sized logs.  Our wood pile is over flowing so all the wood we cut up from the winter storm damage was advertised for free on CraigsList.  But I just can't handle dealing with no shows and people who can't find my house despite explicit instructions.  I have even stood out by the road after someone called and said they couldn't find our house.  I asked if she was driving a certain car and she said yes.  I told her that she had driven by my house 3 times.  So I stood at the end of my driveway by the curb and she drove by my house again as I was talking to her on the phone. This lady was a professional with influence and power over people's lives.  She said to my husband "here's my business card"  so my husband said "here's mine."  I think it went right over her head.  I don't handle pretentious people very well.

But back to the dead trees.  I advertised on CL yet again, but I was very very explicit that you cut, you haul away, and it would be listed until it was gone.  No saving, no promises.  First come, first served.  Third time was a charm.  Two no shows.  I knew when I got his email that he had it together.

He showed up without getting lost.  He was able to negotiate my driveway with a big truck and long trailer without driving on my lawn or driving over my rose bushes. AND he had two chainsaws and one was HUGE.

He studied the tree, he figured out the center of gravity, and discussed his plan of attack with my husband. He took his time and the tree fell exactly where we and he wanted it to fall.
My husband helped load the trailer and in the time of 2 and a half hours he dropped and cut up a tree with a crosscut of  32X36 inches. Part of the trunk remains because his trailer was full.  He'll return on Wednesday.

The photo below is of the wedge that he cut out of the tree.


As we talked, he told me that you can make syrup from hickory bark and hickory nuts.  Who knew...not me. So I ordered a bottle off of Etsy to check it out.  I'll let you know what I think after I do a test taste because truth me told....I love me some maple syrup.  I've been known to store the bottle upside down when it's empty to make sure I get every last drop of amber goodness.

I've received some of my hostas and once they have all arrived I'll do a post about the various methods that you will receive hostas through the mail.

Thursday, July 10, 2014

Miniature Hostas

I wish I had a dime for every time someone has said to me...."wow, I didn't know that there were hostas THAT small."

Miniature hostas or minis as they are sometimes called are perfect for the homeowner who has a very tiny flower garden, rock garden that is in the shade, or they are perfect for fairy gardens.
I thought it was Cracker Crumbs but it's not
I bought my first mini about 7 years ago.  At that time there were just a handful of plant varieties to choose from but that has all changed.  Most large garden shops that have a large hosta selection will usually offer at least 2 or 3 minis.  But if you want a large selection to choose from then the Internet is where you should go.

There was very little long term data on growing minis when I purchased my first batch.  Hostas that I purchased as a miniature variety are now actually dwarf or small size.  I tried to find definitive size information but one person's miniature is another person's very small.  Of course soil and light conditions can also influence how your hosta grows so read carefully the description if you absolutely need a certain size.  It might even be wise to read several growers size description to see if there is a consensus.

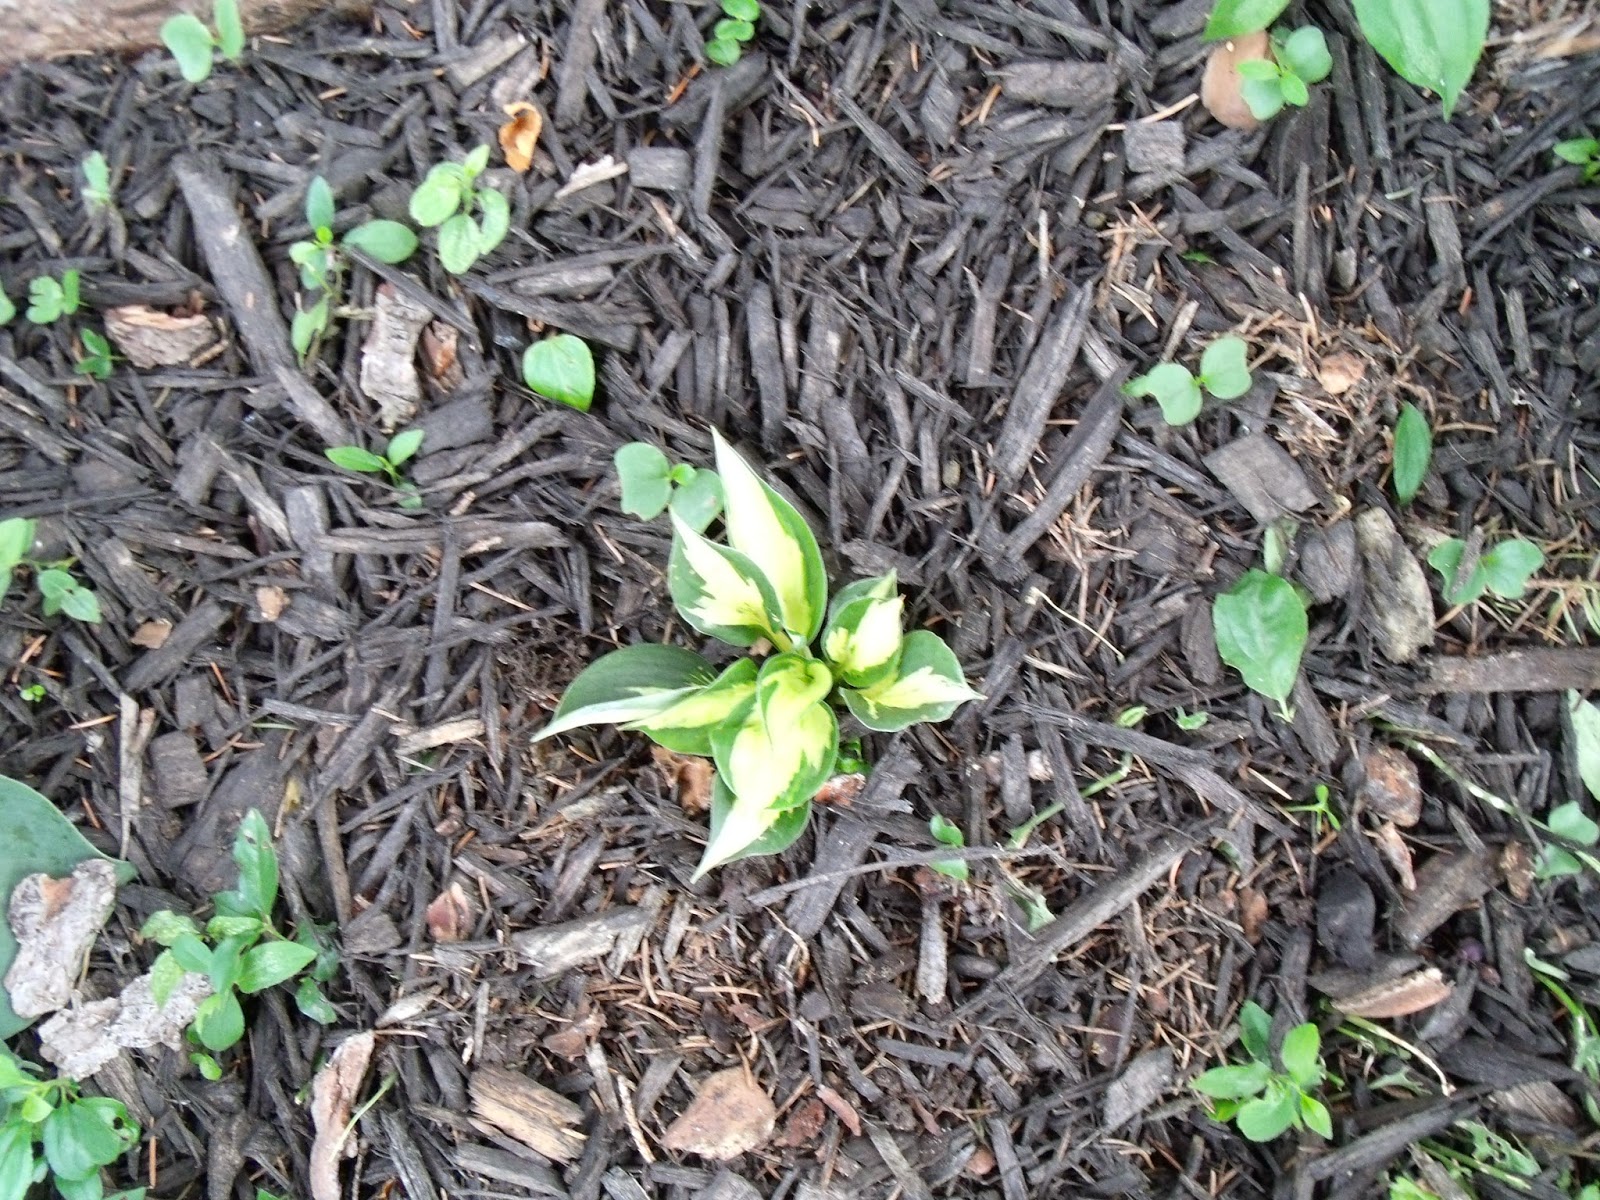
Starting in the top left Stetson, Little White Lines, ??, Dragon Tails.

Clockwise ????, Whirlwind (small), Cheating Heart
Miniatures or very small hostas work great for the very front of your hosta border.  You know that one little spot where you can still see soil in your vast sea of hosta leaves.  In my garden I have planted minis, very small, and dwarfs on both sides of the walkway that leads to my fountain.  They are so cute when they flower because the flower is sooooo tiny.
Rock Princess in bloom.
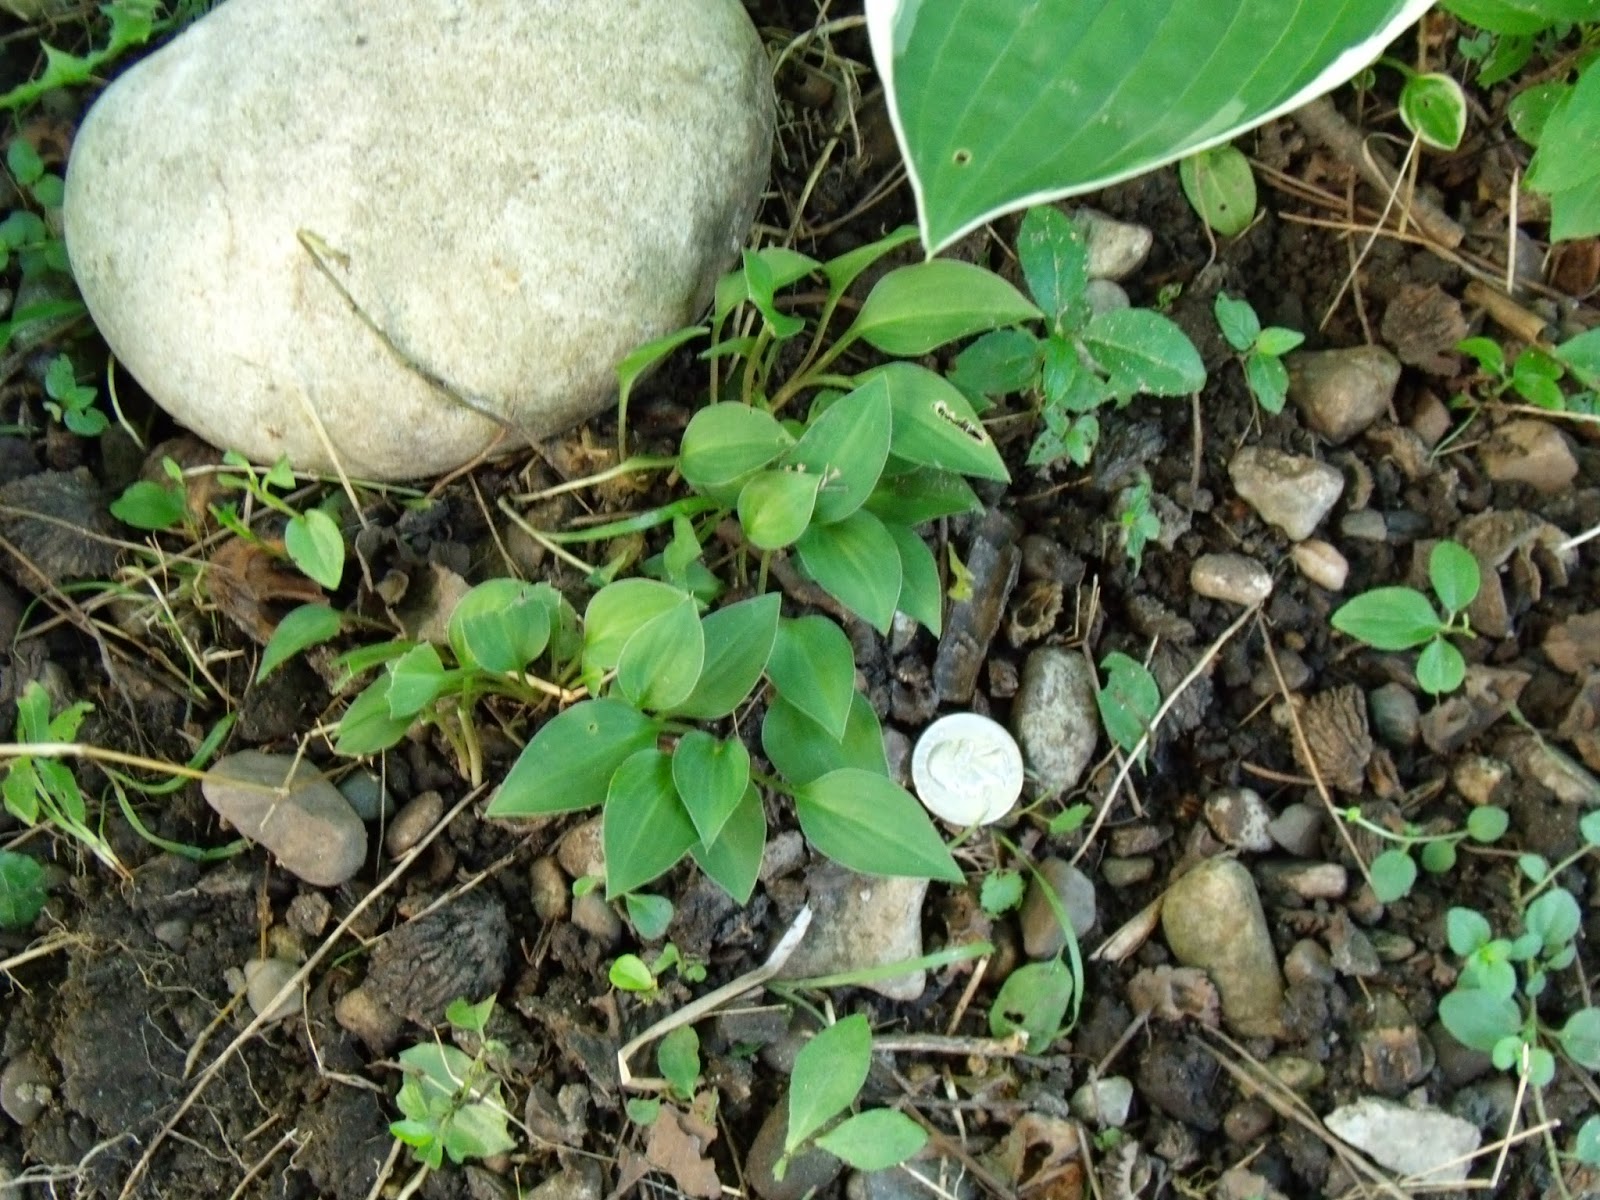
Look for the quarter in the photo above and below to give you an idea of scale.  I would not classify the hosta below as a mini but more dwarf size.
This hosta (below) is the smallest one that I have in my garden.  It is called rock Princess.  The leaves are tiny and it only grows to about 2 inches in height but it's a spreader and hardy.  Look at the normal size hosta leaf at the top of the photo.
The miniature hosta that I really really wanted is called Pandora's Box.  It has white and green leaves and they are very tiny.  Unfortunately, I tried growing it twice and both times they did not winter over.  I have since read that some growers will not sell them because they are so touchy.  The same goes for Fire and Ice.

I sure hope that I remembered to pick up all those quarters.  Oh by the way......I did not verify the names and just tried my best to remember names.  I am starting the priming of the front of the house tomorrow so I need to go to bed. Maybe I'll dream about the 39 hostas that will be on my doorstep in 3 days!!!!

Monday, July 7, 2014

Dividing Hostas and Getting more for your $$$

Today I divided the two hosta plants that I purchased from the garden shop. Maui Buttercups on the left and Paul Revere on the right.
The key to a successful divide is a sharp utility knife and a bucket of water. First remove the hosta plant from the pot.  Remove as much soil or potting medium as possible without harming the roots.  Next swish the plant roots in a bucket of water to remove the remaining material.  You can use your hand to move the roots around to aid in the removal.

This part is important.  Take your time and inspect the plant to see how many divisions you can get.  I use a disposal utility knife because it is sharp and long.  Place the knife between the individual plants and slowly cut downward.  Gently pull the plant apart taking your time to undo the roots from each other.

Dividing the Paul Revere hosta.

This plant was planted in ground up coconut shells and it easily washes off the roots.  The root mass was mostly the thick roots and very few fine roots.
Using the sharp utility knife with the adjustable blade extended , I made my cut between the two plants. I never realized how difficult it was to cut and take a photo at the same time.  Luckily it was only the plant that was divided.
This resulted in two plants.  The plant on the right has a very small plant attached to the larger plant but I felt that the original plant was already on the small side to I left it attached.  It is very important to put the plants immediately in water after cutting so that the hair roots do not dry out.
Here is the Paul Revere hosta planted in the bed.  This bed has mulch in it and usually mulch is discouraged as it attracts slugs that can eat holes in your hostas.  But this is my driest bed and slugs have never been a problem.

Next is the Maui Buttercups plant. This plant was planted in potting soil and it was impossible to get all the soil off the roots because of the size of the root ball.  It is only necessary to rinse enough potting medium off to give you a good look at the plant so you can plan your cutting.
 The first cut yielded two plants.
But I felt that the plant was large enough to divide again.  This gave me 4 very healthy plants for a cost of $17.99.

Maui Buttercups grows to a height of  8 to 12 inches so it will stay low between these two larger and taller hostas. By next year this plant will increase and have three divisions and the following year between 6 and 9 divisions.  It is best to wait at least three years before dividing again.  I love the contrast between the blue and yellow.  The plant on the left is Red October and the stems or petioles are red.

Always water thoroughly every day for the next week or so.  I also add a small amount of water soluble fertilizer to help it along. It is essential that you do not let the plant dry out during this first year.

I always try and do my cutting on a cloudy day or at least in the shade where it is cooler and later in the day so that it is past the heat of the day.  It rained about two hours after I planted the newly divided hostas so that was a blessing.  They say that Native Americans planted during a full moon.  The full moon shone enough light for planting and the plants or seeds didn't dry out from the sun.  We always try and plant our trees just before the sun sets so that they are not stressed out by the heat and can absorb water and stabilize before the sun rises the next day.

Dividing plants is a cost effective method for having a hosta bed filled with uncommon hostas at a reasonable price.  The plants may be small but they multiple fast and by the second year you will have completely forgotten how small they were the year before.  By year three the hostas will just begin to touch one another and by year 5 the bed will be mature and looking fabulous.

Today's cost

2 X $17.99=$35.98 for 2 plants

After dividing

$35.98/6 plants=$6.00 a plant