Sunday, April 29, 2018

Small Shutters and Raking...

...so much raking.
 All the shutters are hung on the garden shed.  I even painted the frames of the 3 screens.  We need to build a 4th screen for the last window and when we get caught up with all the spring raking we will make one.
Today we discussed that we need storm windows for the shed to keep out the cold wind in the winter. This is more than a garden shed.  In the basement of this shed is the pressure tank for our well.  Because it is below grade it stays above 32 degrees unless the weather is brutal.  So we figure that if we have spray foam insulation in the walls and storms on the windows we should be fine with just heat tape on the pipes.  Normally the heat tape doesn't kick on until the pipes are close to 32 degrees.  If we can keep it at 40 degrees then the heat tape will never come on and will not use any electricity.

We also replaced two broken panes.  All 4 windows need to be reglazed and the paint stripped off the wood parts and repainted.  This is something that I can do one window at a time during the summer while we hang cedar shingles.

The trash pick up guys will probably not be happy with us tomorrow.  We put out 20 trash cans full of leaves.  We need to blow the leaves out from around the lilac bushes out by the street and then we will be done with that area.  R fertilized because it started to sprinkle and rain was in the forecast.  So far....no rain.

Spring clean up is one of my least favorite chores that we do.  But one of my favorite chores is mowing the yard for the first time every year.  Something about the smell of the cut grass and turning the semi green lawn scattered with leaves and dead grass into a nice green lawn is so rewarding.

But by the end of June, lawn mowing has lost most of it's luster and it is just another weekly chore.  Really it is just like any other task that you do that is the same day in and day out.  Like painting your entire house....by the third gallon of the same color it becomes monotonous.  

Some people do one job at a time rather than multiple tasks at various levels of completion all going at the same time.  We are of the latter because we have to work around the weather, finding parts for various projects, and working around the budget. 

So here is what is currently happening or going to happen in the near future. 

Finish the raking
Buy plants for the pots and window boxes
Take the outdoor furniture cushions to upholsterer for new fabric
Build a peaked roof on the almost flat roof on the back of the house (probably hire this out)
Remove third chimney (not in use) need space and don't need the chance of a roof leak
Have chimney repair guy rebuild or repoint the two chimneys that are for the three fireplaces
Power wash the two chimneys to remove the pale yellow paint
Have retaining wall built and patio pored with exposed aggregate 
Remove old cedar shingles off the back of the house
Strip old paint from windows and trim on the back of the house
Fix any broken or missing sheathing
Install new cedar shingles
Order and install the last two windows that need replacing with restoration windows
Order custom sized exterior french doors for the master bedroom  
Build Juliet balcony off of master bedroom
Remove old garage door under the deck and close it off
Move basement door to where garage door was & install original house window where the door was
Paint house and barn
Work on two secret projects 

Whoa....I need a nap after reading that list.  But like everything else that we do, we will do it one step at a time and make sure we do it right so we don't have to re do it in 5 years.

Reuse Repurpose Recycle

Don't forget to follow Gear Acres on

Pinterest

Thursday, April 19, 2018

Board and Batten Shutter Tutorial Part 6

Board and Batten Shutter Tutorial Part 5

Shutter dogs are the apparatus that hold an operating shutter in the open position.  My shutters do not move but if they did open and close, I would need something to hold them open.  Without anything to hold the shutter open, it would bang and slam the window casing whenever the wind blew.  
Our intent is to make the shutters, that we built, look as close as possible to operating shutters.  You are probably wondering why we just didn't make them operational.  We have storm windows and the area where the storm window sits is the exact location where the shutter would be if the shutter was in the closed position.

I purchased vintage wrought iron shutter dogs but you can buy new wrought iron shutter dogs and even plastic shutter dogs and pull rings for vinyl shutters.  So if you like the look but have vinyl shutters and thought you couldn't get the look of operational shutters then you are in for a surprise.  Search for vinyl or plastic shutter dogs and ring pull on the Internet.

The shutter dogs that we used have 4 parts.  The S shaped scroll, the long lag screw, cotter key, and a washer.  You will need to decide before you assemble them whether you want the bottom scroll to point away from the shutter or towards the shutter.  I chose the option of the scroll to face away from the shutter and assembled the shutter dogs so the large scroll when on the bottom scrolled away from the shutter.  

The larger scroll is on the bottom.  This is because the larger scroll would weight more than the small scroll and stays put on the bottom due to gravity.  If you put the small scroll on the bottom, your shutter dog over time could flip or at the very least move.
I will hand paint the screw head and washer after they are installed.  If I painted them before installation the paint would get chipped off during installation. 

The lag screw has a square 4 point head.  Your first inclination might be to screw the lag screw in using a crescent wrench or open end or box end wrench but the easiest and fastest method is to use a 12 point socket and a ratchet.  I used a 15mm 12 point socket.


The location of the shutter dog is where ever you want to put it.  But generally speaking it is usually found on the bottom corner or mid way on the outside length of the shutter.  We chose 4 inches in from the bottom outside corner and 1/2 inch below the shutter.  We drilled a pilot hole slightly smaller than the diameter of the lag screw.

Screw the lag screw in and stop when the scroll is resting against the shutter.  To keep your paint job from being scuffed just hold the scroll in the desired position as you screw it in.
Lag screw not fully screwed in.

 Window 'before' board and batten shutters and shutter hardware.
 Windows 'after' board and batten shutters and shutter hardware installed.
South  window 'before' board and batten shutters and shutter hardware. 
South windows 'after' board and batten shutters and shutter hardware installed.
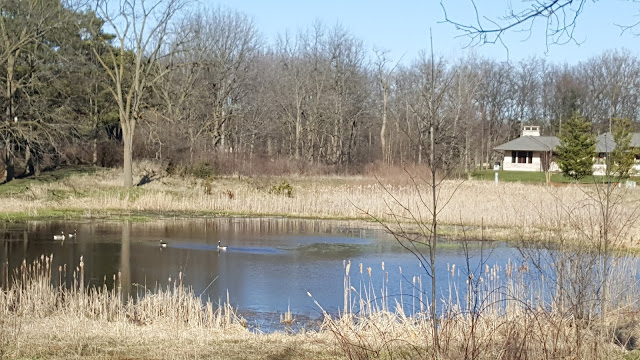
Brisk spring afternoon on the pond.
Today, I also painted all the small shutters for the garden shed.  We will install those shutters tomorrow.

Reuse Repurpose Recycle

Don't forget to follow Gear Acres on

Pinterest


Board and Batten Shutter Tutorial Part 5

It finally stopped raining or snowing so we took that opportunity to hang the two sets of shutters that we built in March.  If this project is new to you and you want to catch just click on the links before.


We drilled pilot holes before installing the hardware.  At this time we also drilled the pilot hole for the 3 inch long deck screw that we use to attach the shutter to the window trim.  The deck screw pilot hole is hidden under the black strap hinge and because of this we do not install the screws in the strap part until the shutter is in place.  We do install the screws in the hinge part because it is much easier to install those little screws while on the ground rather than on a ladder.  We also install the pull ring at this time.
The top deck screw is screwed in first.  This allows the shutter to stay in place while you use a level to make sure the shutter is straight up and down.  Make any adjustments before you screw in the bottom deck screw.  Finish installing the screws in the strap part after you have both deck screws in place.  It will be easy because you have pre drilled pilot holes for those screws.

Tomorrow we will install the shutter dogs.  Just as we finished hanging the second set it started to sleet and snow.  We are 2/3rds of the way through April and it is still snowing. 
 Before shutters on the south side. 
After shutters are installed on the south side.
West side windows before shutters are installed.
After photo of the west and  south side.
The front of the house looks more balanced now that there are shutters on the front of the library.
Sleet on the deck.

Tomorrow we will install the shutter dogs.  Just as we finished hanging the second set of shutters it started to sleet and snow.  We are 2/3rds of the way through April and it is still snowing.
First bloom of the year.  A lovely tiny daffodil called Tete a Tete. 

Reuse Repurpose Recycle

Don't forget to follow Gear Acres on

Pinterest

Monday, April 16, 2018

You Never Know What is Behind That Board....

...until you remove it.

I feel like I'm beating a dead horse but because the weather is not cooperating, we have not been able to do anything outside since last Wednesday when the tree trimmers from Precision Tree and Shrub trimmed our trees.

I was able to get one top coat on the two pairs of shutters for the library windows on the front and south side of the house.  I really want to get these shutters hung before the paint gets bumped or scratched while they are in the game room/current work room. 

We have two projects that we are going to build and use outside.  I have all the parts except for the wood, but our scrap wood pile is so depleted that we are at a standstill until I find the right size wood for free.  Then two days ago, I found that wood right there above the current scrap wood pile of 1 by lumber.  Our 2 by scrap lumber is stored in the barn and R is guarding that lumber like it is gold.  Don't get by his stash....LOL   
But back to the new found scrap lumber.  While we AGAIN looked through the 1 by pile, I just happened to look up and a light bulb went off in my head.  Isn't it weird how you can just overlook something that is right in front of you?
Above our heads was what I thought was a faux boxed in beam.  Why I thought it was faux/fake was because there were fake beams just like this one in the kitchen before we removed them.  This fake beam was constructed of true 1X6's.  Three very long 1X6s.  These 3 boards will make both of our projects.
R was thrilled that I wasn't going to change my plans and make the two projects out of 2 by lumber. We got out the ladder and a Wonder Bar and started prying and prying and prying.  The euphoria was slipping away very fast.  We pried a small slit of an opening so that R could get a cutting wheel in there to cut the nails.  Finally when enough nails were cut, we could finally see inside the faux beam and inside the faux beam was a real steel beam.  Oh crap.
This is how projects on old houses spiral out of control.  Every piece of drywall or plaster or wood that you remove, could reveal either horror or nothing.  Kind of like Schrodinger's cat.  Until you remove the board, what's behind the board can be both a horror or nothing at all.  Remember when we removed the old shingles on the east side, only to reveal another layer of shingles with live wires stapled to them?  We expected nothing at all but instead we found a horror.
We will not know how to fix this metal beam problem until we remove the plaster and drywall ceiling so we can see the entire picture.  But right now we just want those 3 pieces of wood.  Of the two projects, one can wait but the other is time sensitive and I need to build it before June 21st.  

Only one board has been pried loose because the other two boards are held in place by plaster on side and drywall on the other.  So tomorrow we will try and get another board down after we hang the two sets of shutters, if there is time. 

Reuse Repurpose Recycle

Don't forget to follow Gear Acres on

Pinterest

Friday, April 13, 2018

Tree Trimming with Precision Tree and Shrub

The trees here at Gear Acres were in very bad horrible condition when we purchased this house in 2004.  There were dead trees and trees with broken branches and branches that hung over the roof and a big dead tree with branches laying on the power line that lead to the house.

Over the years, R and I have had to cut down far too many dead ash trees due to the emerald ash borer.  It is sad that sometime in the future, the ash tree will no longer exist.  How will they make baseball bats?  Aluminum?  I hope not.  I much prefer the crack of wood bat.  

We have gotten to the point where we needed to call in professionals because the limbs were too high or too big for us to deal with safely.  So we called Precision Tree and Shrub.  They cut down several trees for us about 8 years ago and we were very happy with the results, so we called them back.

They arrived shortly after 8AM.  The weather was brutality cold with wind and driving sleet/snow.  The temp was 36 degrees but it felt like 20 degrees.  By noon it was 40 degrees and by the time they left it was 53 degrees and sunny.  BTW we are currently under a severe winter storm warning and are bracing ourselves for 2 days of freezing rain.   Go figure.  We hire a company to cut out the storm damage from 4 years ago and we get a winter storm warning, two days later, in the middle of April.  Only in Michigan.

Precision Tree and Shrub offers an 8 hour deal where you get 3 guys, a wood chipper, and a bucket truck for $2150.  We had a full day of work and had we priced out each tree we would have paid more.  In the end we had exactly 8 hours of work for them to complete.

One of the reason we liked this company and called them back was because they do not use spurs to climb the tree.  Climbing spurs can cause damage to the cambium layer and create holes in the bark that can lead to rot.  The cambium layer is the layer with actively dividing cells.  If you want your tree to grow, then you need a healthy cambium layer.  All the botany classes in college finally paid off...LOL.  


Besides removing the ice storm damage, they also removed two black walnut limbs that were directly over the sun room and hung over the chimney.  They also removed the downward growing limbs on another black walnut and raised the canopy of that tree to match the one next to it.  The black walnut tree by the garden shed also needed downward growing branches removed.  The large silver maple next to the deck needed the storm damage removed and the branches growing toward the house removed so that we can put a peak on the flat roof area.
Before photo of the large silver maple tree by the driveway.
The rotted limbs that were removed.

But the biggest job was the large silver maple next to the driveway.  This tree gives us our afternoon shade and it needed the most help.  There were large rotted limbs and lots of broken and dead smaller limbs.  They were all removed and it is now safe to park a vehicle underneath it.

After photo....much better.

 Morrie, Sasha, and Patches checking out the dead tree limbs.
 Morrie was so happy.  So many new things to smell.

 We had the guys leave us the big stuff and they chipped the rest. The logs that we do not need will be given away for bonfire wood.

If you live in Genesee, Livingston, or Oakland county and need help with your trees and shrubs give the guys at Precision Tree and Shrub a call.

Reuse Repurpose Recycle

Don't forget to follow Gear Acres on

Pinterest

Sunday, April 8, 2018

Red Antique Howe Candy Scale for the Kitchen

I swear that every time I say that I am not going to buy anything else until I sell my stash of furniture and antiques that I know that I will not use.....I see something that I need to have and that something recently was an antique red balance beam candy scale.  Yes, red.  If it had been green, or cream, I probably could have fought the urge.  Had it not had the brass bowl.....I probably could have passed on it.  If it didn't have the weights.....I might have been able to look the other way.  But, damn it.  It had it all.  And it even had the vintage weight certification tag still intact.  But most importantly, it was red. Not a tomato red, which isn't bad, but it was a blue red......apple red.
 These two photos are of the actual scale taken from the seller's listing.
R has been testing out products on the brass and tonight he found something at Kroger, that really worked well. Plus, it was in the bargain bin!
I can't believe I chipped my nail polish.  I wish someone would come up with DIY proof nail polish.
 I will start looking for the perfect red spray paint tomorrow at Ace Hardware.  Rust-oleum has about 5 reds that are close.  I'll take the scale into the store so I can match it.

The scale also has a little white design on the base.  You can see a little bit of it on the base of my scale.  It is hard to see but it looks like little single white leaves and they look hand painted.  I found several other styles of Howe scales with white designs.
I did find a photo of the same style of scale and the flat side where you place the weights has a gold ring design on it. 
This should be a fun project but I want to wait until it is summer so the paint can cure real well in the sun before I try to add any of the details.

 I know some people think that you should leave the patina BUT this is red paint with lead and with a lot of corrosion.  This is for my kitchen and I don't want that by my food.  If the scale was in the condition of the scale in the above photo, I might consider it but it isn't.  I want to use the scale occasionally and maybe place fresh fruit in the brass scoop/bowl. 

 So until this summer, I will box everything up after I find the right color of red and wait until it decides to warm up.  

Reuse Repurpose Recycle

Don't forget to follow Gear Acres on

Pinterest


Monday, April 2, 2018

Priming the Small Shutters before the Snow....

...yes, you read that correctly....snow!!!  Why????????  I have be optimistic and hope that it will only be slush.  Why would the weathermen get it correct now when they have  been consistently wrong all winter?  
Today, I primed 2 sets of small shutters.  That's both the front and back, two coats.  I, also, primed the outside of one flower box with just one coat of primer.  
In between priming and waiting for the primer to dry, I did a little more raking and some burning.  We also put the tops back on our concrete bird baths.  The tops on the bigger bird baths are usually leaned against the base but with the smaller bird baths we usually just flip the tops over. 

That reminds me....I read about some additive made exclusively for bird baths.  We have a real problem with red algae growing in our bird baths.  The birds love the bird baths so we need to make sure that the product is safe for birds.  I'll let you know what I find out. 

Reuse Repurpose Recycle

 Don't forget to follow Gear Acres on

Pinterest


Sunday, April 1, 2018

Happy Easter and Passover and Next Week's Agenda


 Happy Easter and Happy Passover (Chag Sameach!) to everyone.  I hope that your day is joyful. 
We will celebrate Easter at my son's house.  I hope that the day is rain free for those who are having an Easter egg hunt.  I can remember an Easter egg hunt when my son was three and it was so cold that the kids were dressed in snow suits and boots.

This next week's agenda is looking like it will be indoor projects, no outdoor painting, and maybe some table saw painting and assembling.  The weather looks to be rainy and cold with the possibility of snow.  I'm trying not to be too bummed out about the weather because the forecasting has not been too accurate as of late. 

The final parts have arrived for the table saw.  I think we will try and spray paint the table saw housing while it is in the workroom.  Not ideal but if I buy some plastic sheets to cover the surrounding area we might actually be able to pull this off without too much of a mess. Then we can start to put it back together.  I bought an accessory kit off of eBay but that is not needed to put the saw back together.
On Monday it is suppose to be cold but no rain so the rotting sill project can get some more attention and I can rake some more hosta beds.

If it does rain on Tuesday we will mask off the table saw in preparation for spraying painting the housing.

Wednesday is another rainy/snowy day and we can spray paint and maybe rummage through the scrap pile for wood for my secret project.

Thursday and Friday are cold days but no precipitation so the raking and window sill work will continue. 
I can't remember a time when I have been so frustrated to start work and cannot because of the weather.  Could it be that for once I am organized and I have to wait on the weather?  In the past it was a case of nice weather but not prepared.  I don't know which is worse.

Reuse Repurpose Recycle

 Don't forget to follow Gear Acres on

Pinterest