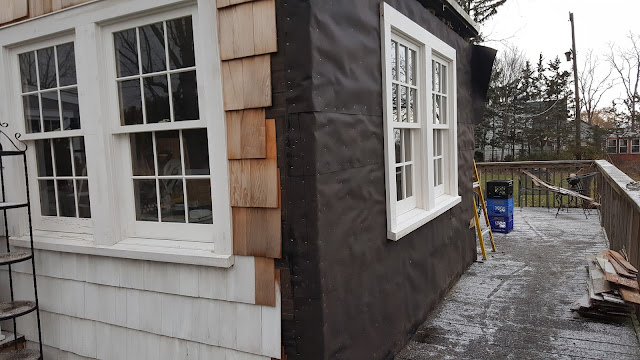
It was so great to finally get that window installed. It took us awhile because of rain, mowing the lawn, and finding a time that G, our son, could come over (racing season) and help lift the window into the opening.
The double window is a made entirely out of wood and completely trimmed out which makes it too heavy for me to help. R had that torn bicep muscle earlier in the summer, so it was the best course to have someone who could carry more than 50% rather than someone like me who would carry less than 50%.
G also helped R remove another large non original window. This window will not be replaced. We have enough windows in the game room and wall space is needed for the TV.
We are going to remove the short studs which were under the window and use floor to ceiling studs. By now it was dark so we put a tarp over the opening. We worked at removing the short studs and installing the full length studs from inside the house.
The next day we sheathed the opening with all the old wide 1X8s that we have salvaged from our other demos. Tomorrow we deal with the wires on the outside of the house.
During the summer we removed all of the cedar shingles and after they were removed we could finally verify that this area was indeed an open porch and on the north side of the new window we found 3 wires attached to a second layer (original) of shingles.
On top of that mess we also found a nail that was driven completely through a live wire. I flipped the main breaker to turn off all the power and then R pulled the nail out and removed all the large heavy duty staples that had them attached to the first layer of shingles.
We then tracked the wires. One wire was for the old security system so the end that was in the house was already cut off and the other exposed end was just laying there on the flat roof over the 'used to be old porch'. Before we purchased the house the porch was already enclosed and made into a back room of sorts. It will be our future game room. We pulled that wire through a hole that was in the corner at the top. One wire down and two to go.
The second wire was regular interior wire and it too was laying up on the roof but slightly under the bottom row of wood shingles on the second floor and then covered with roofing tar. R couldn't tell if the wire went into the house until he dug away some of the tar. He had to use a Wonder Bar to pry the glob off. The wire was now exposed and it too was not attached to anything so we pulled it through the hole. What it was for is still a mystery.
Wonder Bar
Two down and one to go. That left the wire that went from the second story exterior of the house over to the garden shed/pump house to supply the pressure tank with power. He had to cut the wire at the spliced area where the live wire (had the main off) was attached to the wire that was wrapped around the tension wire going to the shed. Before he cut the wire, R used electrical tape to secure the electrical wire to the tension wire so it would not unwrap itself. As with the other two wires, we pulled it through the hole.
We now had two wires laying on the deck that would be live once we turned the main back on. We started with the smaller wire (regular interior wire) and noticed that both wires went through a hole in the sheathing that probably took the wire to the breaker box in the basement which was almost right below us.
I went down in the basement and R stayed outside and started to move the wire so I could see which one was the one I needed to pull through the wall. It was easy to see and I pulled it into the basement, coiled it up, taped up each end of the wire, and left it for later. That wire will be used for an outlet on that short length of basement wall. If the breaker box had been labelled I could have just flipped that breaker but since nothing was labelled and we were running out of daylight, we left it for another time.
The last wire was the long, large gauge wire that goes to the pump house. Believe it or not, that was the only circuit marked, so I flipped that breaker off and flipped the main back on. We checked the wire to make sure it was indeed NOT live.
Two wires down and one to go, unfortunately it was the most difficult wire to deal with because of the gauge and where it had to go. This wire needed to go into the wall cavity so that it could go through the roof using a mast head where we would attach the tension wire to the mast head using a special clamp.
We were running out of daylight fast so we went into the house and then into the game room where this wire needed to go into the wall cavity. First, we needed to remove some drywall which was OK because the room doesn't have the original plaster (only on the ceiling) and our plan is to re drywall anyways. R then cut out that area of the sill plate.with a reciprocating saw and that allowed us to pull the wire into the game room.
Once we had the wire in the house, R cut a piece of 2X4 to nail on top of the 2X4 that he damaged while trying to get the wire into the house. But first he drilled a large hole in the 2X4 and we pulled the wire through it and then secure the board in place.
The sheathing will have to wait until tomorrow
because we were dead tired. Good thing we filled some buckets with water so we could flush toilets. We ate and went to bed.
The next day the first item on the list was filling the holes in the old sheathing with rigid foam insulation.
We keep all of our scrap rigid foam insulation for these repairs. There are holes every where because of the blown insulation. Now when they blow insulation into the stud cavities through the exterior wall, they cover the hole with a plastic plug.
The photo above shows three holes that were filled with rigid foam insulation.
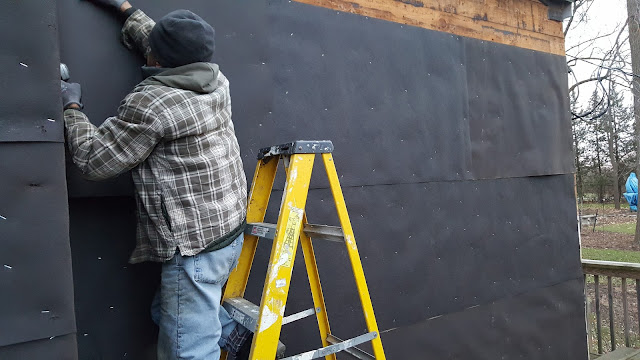
Then we stapled up the tar paper during a wind storm with 30 to 40 mph winds. It just had to be windy. Nothing is easy with an old house.
Reuse Repurpose Recycle


