Wednesday, March 31, 2010

Coal Chute Door Primed & Red Sink

The coal chute door is looking good. It has two coats of gray primer and is ready for the final coat of satin black.

I think we should wait until after the shingles are painted gray before we paint the coal chute door black. If we paint it black right now we will most certainly end up with gray paint drips on it.

Here is the before we did anything to the coal chute door photo.
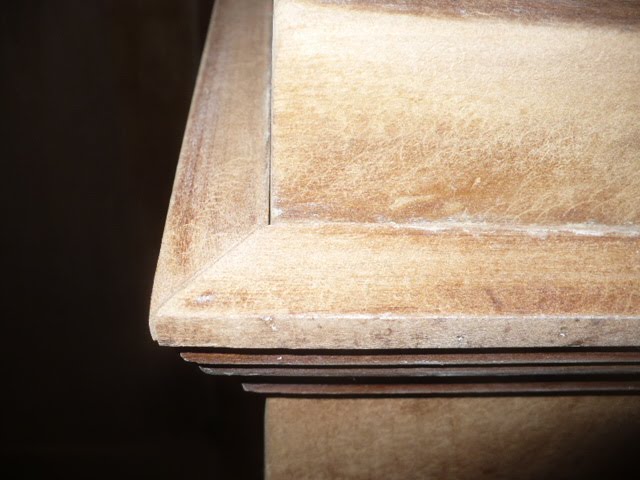
Here is the coal chute door after raising the concrete and after sanding but before spray painting gray primer.
Finally, the coal chute door after it was painted with gray primer.
We have been using this great weather to rake up leaves. Love the trees....hate the raking.

If anyone is in need of a red cast iron Kohler kitchen sink....I have one cheap!!! $25.00

The dust and dirt is free. The entire sink and attached drain board is 43 inches wide. The red is a bright tomato red and the sink is chip free. The date stamped on the back is 11-79. FYI this sink is very heavy.

Saturday, March 27, 2010

Coal Chute Rehab

I had planned on raking today but we were sidetracked with the coal chute door rehab. After much discussion (that is code for arguing), we (that is code for I persisted and won) decided to dig some more so we could get a small pot jack under the concrete.

R went to the barn to look for a pot jack and came back with a port-a-power which was just what we needed. A port-a-power is a portable hydraulic cylinder connected to little jack by a length of hydraulic hose.

After topping off the hydraulic cylinder with jack oil R placed the jack on a brick so it could not sink into the dirt. In the photo below, the jack is extended and under pressure.The next photo shows the cylinder. Notice the little lever on the cylinder on the opposite side of the cylinder where the hose is attached.
This lever has two positions, pump or release. You cannot build pressure when the lever is in the release position because this places the valve in the open position. Nothing will happen if you pump the handle while in this position because the fluid will just recirculate back to the reservoir. If you flip the lever to the pump position it will place the valve in the closed position. When you pump the handle while in the closed position the fluid cannot return to the reservoir so it builds hydraulic pressure in the hydraulic hose and pushes the jack upwards. This results in a mechanical advantage which is the relationship between the force you apply and the result you get. In layman's terms this is "big results for little effort."

A little bit of warning is needed here. Hydraulic pressure is serious business. If you are unsure of what you are doing it is best to pass up this method. Since both R and I are Journeyman trades people we are trained in the use of hydraulics. R has over 30 years of experience in hydraulics. When working with a partner always use voice commands when working with stored power. Before pumping the cylinder I always said, "hands clear" and I would not pump until R said he was "clear". The pounds per square inch would immediately crush and possibly shear off a finger before you could release the pressure.

Hydraulics works on what is called the Pascal's Law.

Pascal's Law

In fluid mechanics, the statement that a fluid at rest in a closed container, a pressure change in one part is transmitted without loss to every portion of the fluid and to the walls of the container. The principle was first stated by Blaise Pascal, who also discovered that the pressure at a point in a fluid at rest is the same in all directions, and that the pressure would be the same on all planes passing through a specific point.

Basically what he was saying is that the pressure is equal and undiminished throughout the system.

Hydraulic pressure is used to operate your vehicle's brakes. You push down on the brake pedal and that forces the piston in the master cylinder against the fluid in the cylinder. The pressure on the fluid in the master cylinder transmits through the lines to the brake cylinder at each wheel and forces the brake shoes or discs against the drums or rotor just like how the jack worked when I pumped the handle on the port-a-power.

This is why you need to maintain your brake fluid to the correct level. If your brake fluid level is low the resulting hydraulic pressure will be low and braking will be inefficient. Make sure you use the correct Dot rating of fluid (found in owners manual).

Brake fluid loses it's effectiveness when it becomes contaminated with moisture. DO NOT OPEN your brake fluid reservoir to check the level because this allows humidity to contaminate the brake fluid. You will notice that the brake reservoir is normally made of a light color plastic, this allows you to see the fluid level without opening the reservoir. If you cannot see the fluid line clearly take a flashlight and shine the light against the side of the reservoir. This should enable you to see the fluid level. The reservoir is marked with lines indicating operating and fill levels.

Brake fluids lose their effectiveness over time because of the high temperatures that they operate under. If your brake pads and discs are in good condition but your quality of braking is poor.....you may need to replace your brake fluid. This should be left to a professional. Bleeding the brake lines of air can be a tricky procedure. Air in the brake lines will result in your brake pedal feeling mushy or even going all the way to the floor without your vehicle stopping. I know whenever they bleed the brakes on the race cars......much cursing and swearing can be heard. There's is nothing worse than being on the race track and having your brake pedal go to the floor!!!!

On to air pressure or pneumatic pressure. R decided to try the pneumatic orbital sander on the coal chute door before he hauled out the portable sand blaster.

Before using pneumatic tools add one or two drops of pneumatic oil into the fitting where you attach the compressed air line. The oil will lubricate the internal parts of your tool and help resist corrosion from the moisture that may get into your compressed air. You can reduce the chance of this happening if you install a filter/separator after your compressor but before your tool. Normally these are installed on permanent systems but today we were using the old and I mean OLD homemade portable compressor that R's dad made many moons ago.
The orbital sander worked surprisingly well. After he sanded he used the air gun to blow away the dirt that was on the concrete pad. Remember to wear eye protection when using an air gun. Dirt particles could get embedded in your eye if they are unprotected.
Here's the before photo of the coal chute.
And the after photo. R has a little more sanding to do before he primes and paints the coal chute.
We are very happy with the results.

Does anyone else have a coal chute?

FYI......If you are restoring an old house and need advice or guidance, hop on over to the Old House Web site. The site is very informative and is easily navigated. I personally love the forum area where readers can ask questions.

Friday, March 26, 2010

Glass Beads

We received the vintage hinges we needed for the two French doors we are installing. Installation is on the back burner until it either rains or we finish raking up all the leaves that cover the flower beds.

Today I started raking the bed that has lavender and Knock Out roses. For some reason the leaves really pile up in that bed and trying to rake out the leaves is very difficult.

Also the hydrangeas and the roses both needed trimming. I was wearing gloves to keep from getting poked but the gloves kept getting caught on the thorns. So needless to say the going was slow plus it was cold outside. It looked far warmer than the 40 degrees it reached today.

This past Monday R learned how to make glass beads. He was so proud of his little plastic bag of glass beads. I hope to make them into a necklace or bracelet. I'm amazed he doesn't burn his hand while making them because I have two burn marks just from using a heat gun.

The photo of the beads don't do them justice.
These two are really cool with the feathering.
The two yellow beads have little dots all over them. I think he rolled the hot glass bead in ground up glass dust.
He only made one bead (right bottom of photo) with little bumps.
R said he is going to make more beads. He was just getting the hang of it when the class ended.

FYI....I had a reader ask about the wood cold air return that we installed. I forgot to mention where I bought it. I purchased it off of eBay. There is a seller on eBay who customs makes these in various sizes and woods.

Thursday, March 25, 2010

Better Than New + Scrap $$$

While I was stripping the staircase I came across several areas that had paint and caulk deep into tiny crevices. I tried using my putty knife, my scraper, and even my dental tool pick but I still was unable to get all the residue.

In some areas all I managed to do was make the crevice bigger. So I hauled out my tiny Wonder Bar and removed the piece that was keeping me from getting to the dried up paint and caulk.Here is a photo of the pieces after they were sanded.
The sanding of the newel post revealed the original carpenter's pencil mark that he used to align the trim. Thanks Mr. Carpenter.
The joints are now tight and the the trim is straight.
The other pieces of trim that I removed were these two flat pieces that were attached to where the staircase meets the ceiling in the first floor hallway. I stripped and sanded both pieces and the first piece went back into place without a hitch. The second piece was another story.
One of the problems was that we were both trying to stand in the same place, on the same step, while one of us held the wood piece in place and the other held a pneumatic air nailer. As hard as we tried the piece just would not lay flat. After much debate we came to the conclusion that the piece was about a 1/4 inch too long. This would account for why there was a gap and why it was chock full of caulk.

R trimmed off an 1/8th of an inch and we tried again. The piece was still too long so he trimmed another 1/8th of an inch off the piece. This time it fit perfectly. But by this time my arms were so tired that I could no longer raise them in the air to hold the piece in place. Thankfully we have a full array of clamps and we were able to clamp the piece in place. Now that piece is better than new.
Yesterday I trimmed back my Pink Diamond hydrangeas in front of the dining room windows. This gave us access and space to work on the coal chute door.
Last year I was able to remove a lot of the thick peeling paint with a putty knife but the remaining will need to be removed with our portable sand blaster. But first we needed to shovel the dirt away and decide how we will keep the dirt from returning.The concrete pad has sunk down and pulled away from the foundation wall about 2 inches. We thought if we dug down deep enough we could lift the whole piece up into place. R dug down 12 inches and did not find the bottom of the concrete. We decided at that point if we ever did find the bottom that it would weigh far too much to move.
On to Plan B, which is to leave it alone and slope the dirt away from the concrete pad. We will use large rocks to build a mini retaining wall along with some landscaping fabric to hold back the dirt when it rains.

If you are wondering what is that piece of sheet metal that is attached to the center of the coal door......well we don't know. We speculate that based on the size that at sometime in the past they cut a hole and installed a dryer vent. Now why oh why couldn't they have at least placed the opening in the center of the door? We are hopeful that once it is painted and the hydrangeas grow back that no one will focus on the ill placement of the sheet metal patch.

FYI.....R just returned home from taking a load of scrap to the scrap yard. Scrap metal is currently $250 a ton which is high and should go down as the summer approaches. R sorts out his copper, aluminum, and brass because that pays more money. He received $65.00 for his semi precious metal and $133.68 for miscellaneous metal for a total of $198.68. Not only does this put money in your pocket but it keeps good recyclable metal out of the landfills.

Just the other day I was watching Modern Marvels on TV. They were showing how copper is mined and refined. The initial cost along with the amount of energy that is used is staggering.

Sunday, March 21, 2010

We've Been Very Busy

We have been so busy that I sometimes forgot to take photos. But as R reminds me....."People don't need to see another photo of a trailer full of wood." He's right.....but don't tell him that!

I've lost track of the number of lawn trailer full of twigs, leaves, and branches that we have picked up so far. Far too many and far too many left to be picked up. We basically stayed outside on all the nice days picking up branches and raking out flower beds. We knew colder weather was coming so we made the best of the good days we did have.

We cut down two semi dead tall cedar trees that were on the back property line. Once they were down we were able to see why they were dying. They were completely rotted out in the center of the trunks. We haven't a clue as to what caused the rot.

Once the trees were gone we then had access to clean out the dead branches, empty walnut shells, and old leaves that have piled up over many many years. We then decided that we might as well get started on the dismantling of the old pool.

Sometimes in the past, probably whenever they decided to decommission the pool, they broke up the floor of the pool to allow rainwater to percolate into the ground. So that leaves us with removing the pool decking which is cement embedded with slate and removing the 10 inch wide cement pool coping (ledge/edge). We plan on using the slate to repair the slate walkways that need to be fixed through out the yard. The cement ledge/edge we will store because it would make great steps or a top for a retaining wall.

We can knock in the walls after all the slate and ledge removal is complete. In the meantime we removed the 24 inch high chain link fence that surrounded the pool. I wonder what the thinking was behind a 24 inch tall fence? R is making a scrap metal run in the next week and now is the perfect time to get rid of it. FYI for all you scrappers out there.....scrap metal is high right now and will soon go lower once summer arrives.

When the weather got cold again......we went back inside where we were back to stripping and sanding. We sold the two poplar doors that were too tall and are patiently waiting for the new door to arrive. The only reason I am patiently waiting is that I am waiting for some vintage ball top hinges to arrive so even if the door does show up we cannot install it until the hinges arrive.

I should finish up stripping the staircase tomorrow. That project went fairly fast because the paint was on top of varnish. The only hiccup was when I run across old carpet tacks that need to be removed. It was very difficult to get a good photo of the entire staircase because it is slightly spiral. The staircase will still need to be sanded and the treads will be stripped with citrus stripper because they will need to be stained and sealed. The rest of the staircase will be painted white with the handrail also stained to match the treads.After tomorrow I will have to make the decision of whether to move back to the living room and strip the baseboard and fireplace mantel or move on to the dining room OR finish the casement windows so when the weather gets warm enough to paint outside the casement windows are ready to go back into their openings. R is voting for finishing the casement windows.

The other day I was on the road as the sun was setting. Wow the sun was huge. There was a heavy haze so it filtered the sunlight just enough so you could see the entire outline of the sun.

Saturday, March 13, 2010

That Blows!

Today was one of those days where not a thing was accomplished. I attribute this to be the results of too much fresh air yesterday and secondly the fact that R was embracing his artistic side today.

The last two days were spent outside picking up logs, branches, and the winter's cast offs like these..........every spring I pick up bottles that are flung out car windows onto my lawn. These are true economic indicators as this is the first year that I have picked up a beer bottle and a light beer at that!!!! Normally I pick up 2 or 3 Absolute vodka bottles....alas times are tough for everyone.

After the bottle pick up, we started the task of picking up the remains from the tree trimming fiasco. Here is a photo of load number one.........load number two.....
.....load number three.....
.....load number 4....
....and then when we ran out of logs.....we made more!!!
We now have the two large trunks cut up. Half of them made it to the wood pile before we ran out of steam on day two. There are 6 remaining pieces that need to make their way to the wood pile. R counted the rings and this ash tree was 75 years old when it was killed by emerald ash borers.

Today is cold and windy and after two days of warm weather.....today kind of blows. Speaking of blows.....R attended a glass blowing class. Years ago he attended a class where they made icicles out of glass. He also made a little male dachshund dog that.....well how can I say this politely...was very well endowed. R said he was having difficulty with the little details.

The class today was a glass blowing class. He made 5 glass ball ornaments of various sizes, colors, and roundness. I think he did a fine job for his first attempt at blowing glass. Next fall he might take a more extensive glass blowing class at the art institute. At the end of this month he is going to attend a lamp work glass bead making class.The hollow glass tube in the photo below is what you start with when blowing an ornament. You add little pieces of ground glass inside and on the outside to get the desired color and texture. The glass tube in the photo is the remnant of a glass bulb that had a blow out. I guess R huffed and puffed and blew his glass bulb to smithereens.
I placed the two tall poplar doors on craigslist and have already received 4 inquiries. Tomorrow I have someone coming to look at them. They are a very good deal for anyone needing 2 poplar 15 lite French doors that measure 30 X 84. One door is still wrapped in plastic. Keep your fingers crossed that someone buys them tomorrow so that they are out of the way. The correct size door will be here in two weeks.

Tomorrow is supposed to be another rainy day so we will spent it stripping, sanding, and hopefully selling doors.

Monday, March 8, 2010

Another Day...Another Door

We did not get as much accomplished as we intended. R sanded the baseboard and touched up some other areas with the sander. I stripped the clothes chute door and started stripping the trim around the built in cabinet.

Stripping was a slow process with a heat gun and dull scraper. Note to self....buy new scrapper tomorrow. I previously had stripped the doors and drawer fronts in the built in cabinet so I can't take credit for stripping those today. The built in cabinet is going to be quite the project because the paint is coming off in gobs.

This is what it looked like when we started today.And this is what it looked like when we quit three hours later.No, we did not install the door. Several years ago, I purchased 5 doors off of eBay from a seller in the southern part of Indiana. We drove there to pick up the doors and even though I told the seller we would not be there until 8 or 9 PM, the seller was already in his jammies and bathrobe when we arrived to pick up the doors. We just grabbed the doors and left without checking them. I did not realize until today that he gave me two doors that are too tall. I will need to sell those on eBay or craigslist. It's a bummer because the doors are new and made of poplar and look perfect except they are too tall.

We rummaged through our stack of doors in the game room and found door that we will install in the game room opening. I insisted that we just place the door in the opening so I could see what it would look like once it was installed. I just love it. The door totally changes the feel of the hallway.I now need to order a door for the kitchen doorway. I am keeping my fingers crossed that I can find the size and type I need IN STOCK at Home Depot. I am getting antsy to install the kitchen door and I really do not want to wait while they order the correct size.

In the meantime we will continue to strip and sand.

Sunday, March 7, 2010

Dutch Door Removal

On Sunday we removed the Dutch style door that leads into the kitchen. The door did not close properly and will be replaced with a French door. R and I agreed that the door was not original to this location once we were able to look at the jamb up close. The deciding factor was when we removed the door stop from the jamb and saw old nail holes and paint witness marks from the door stop's previous location.

Here is a photo of the bottom portion of the Dutch door. The front and back are different styles. The side showing in this photo is the side that could be seen from the hall which is a recessed panel door like the doors in the rest of the house.The next photo is of the top portion and shows the side that faced the knotty pine kitchen.
The knotty pine was attached to the door making the door about 4 inches thick.

We do have a theory about this door. We think that possibly the panel door is original to the location but not the Dutch style nor the knotty pine. We have a hunch that the door was cut in half and knotty pine added to it when they installed the knotty pine in the kitchen. The knotty pine is not original because we can see the painted plaster wall behind the knotty pine panels.

We hope at sometime in the distant future to completely gut the kitchen and return it to a 1930 style cabinets but until then we will make do with what we have. Also the hallway is dark and having a French door will allow natural light to filter into the hallway.

When R was removing the door he said it reminded him of the old TV show Mr. Ed. R said that every time he walked by the closed Dutch door he expected Mr. Ed to throw open the top portion of the door and say, "Wilbur, I need some carrots."

http://www.youtube.com/watch?v=tSsuohepbVk

Now try and get that song out of your head. You will be singing "......a horse is a horse, of course of course....." all day long. No need to thank me......I do what I can.

Back to the house. "...a house is a house, of course of course...." Good grief.

Well anyways. Today we will move along the hallway sanding the base board, stripping the old clothes chute, and sanding this cool built in cabinet. After that we will strip the trim on the doorway leading into what will be the game room. This doorway also had a door on it at one time evident by the remaining door stop and hinge witness marks. Our plan is to install both the kitchen door and this door at the same time, probably mid week.

I had better get ready and go to Home Depot and see if they have any 80 grit sandpaper for a 5 inch round orbital sander. We will need the coarser grit to remove the paint from the built in cabinet. It appears that it was always painted and never varnished. The paint is harder to remove with the heat gun when the paint is not over varnish and always leaves paint that needs sanding.

"...a horse is a horse, of course of course.."

Saturday, March 6, 2010

Will the Dust Ever Settle?

We're stripping and sanding up a storm......a dust storm. Every day I sweep up large piles of hardened paint chips and wood dust.

Today R sanded the wood trim around the opening that leads into the dining room from the foyer. While he sanded, I drove to Home Depot for more sandpaper.

When I returned home, I retrieved the Silent Paint Remover from the pile of tools in the game room. It had been awhile since I used it last. I find it is only useful when working on horizontal projects such as the exterior French doors that we purchased just before Christmas.I stripped one side of one door today. Since I was slightly bent over while I was scraping I now have a sore back. I have decided this is a project that I will need to work on for an hour a day until both exterior French doors and the matching wood storm doors are completely stripped.

I moved on to finishing the small doors that are on the cabinets in the living room. R re installed the doors once I finished stripping and sanding them.

The photo below shows the cabinet doors before the hinges were installed. You can see where we removed the wood shelves. We are installing glass shelves because the wood shelves were warped and cracked. The shelves were also not evenly spaced and did not match the shelves on the other side of the room.
Tomorrow we move on to the kitchen door that is in the main hallway. It is currently a Dutch style door that we will replace with another French door. I don't believe this Dutch door is original to this location because the door jamb looks like it was reworked. Also the door handle is too close to the edge of the door. When you close the door your knuckles hit the door jamb. I believe the door is original to the house but just not in this location. My best guess is that when they enlarged the kitchen it was removed from it's original location and installed here. We will use the Dutch door elsewhere. Where I do not have a clue but we will find a place for it.

The main hallway also needs another French door installed at the opening to the game room. You can see the witness marks of where the door hinges from a long ago removed door were located. They also left the door stop so it's just a matter of hanging another door. We purchased replacement French doors several years ago. But I still need to find door handles to match all our other doors.

The guest powder room is also off this hallway. The door has already been stripped so essentially it's a repeat of what we did to the 2 closets and basement door.

Our plan is to get this hallway stripped and sanded before all the snow melts. Once the snow melts we need to go back outside to pick up all the piles of logs and branches from the two trees we cut down several weeks ago. R also needs to cut up the two big tree trunks from the trees we had cut down last spring. His old chainsaw was not big enough to cut through the large trunks. His new chainsaw should do the job nicely. It will be nice to get outside again but I have a hunch that winter is not over just yet.

A friend asked me "when are you going to paint?" Our plan is to strip and sand the trim and do all the plaster repair on the first floor before we do any painting. The floor plan is too open to try and contain any dust that is generated from sanding. So that is why you haven't seen any painting.

I guess I will have to wait until tomorrow to tell you how we made the replacement pieces for the bevel glass French door. I am about ready to fall asleep on my keyboard. Night.

Thursday, March 4, 2010

Monte, I'll take door number.........

Monte, I'll take door number 2, wait 1, no three.

We've been busy working on doors.......closet door......French door......and basement door. The doors themselves were stripped to the bare wood several years ago and just recently the wood trim around the doors were stripped of their paint. But they still were a long way from being paint ready.

The two doors below are a closet door (closest) and the door (farthest) to the basement and back yard.
The interior jambs needed stripping which we did with a heat gun. The paint was hard to remove from the wood door stop so we removed the door stops on 3 doors and stripped them before we re installed them.

I used a chisel to get between the stop and the jamb. I then used my tiny Wonder bar to pry the door stop away from the jamb.
I then had to remove all the nails.My tool of choice for nail removal is end nippers. The jaws are curved so I can grab the nail and then........while holding on to the nail, I rock the nippers to one side which pulls the nail out using leverage and very little effort. I always pull the nail through the wood and out the back side. This leaves just a small hole on the face to fill. If you pull the nail out through the front of the board you will get little splinters of wood around the nail hole.Notice all that caulk along the sides of the door stop? The reason for the need to caulk a large gap is this bent over nail that did not allow the door stop to lay flush against the jamb.While the door stops were removed we sanded the jamb to remove the little bumps of paint that left an outline of the door stop. We used a pneumatic orbital sander to sand the jambs. Here is a photo after sanding..... ....and after the door stop was re installed. We also oiled the locks, hinge pins, and generally made the doors all open and shut easily.

This is the next door on our to do list. It is a walk in broom closet in the foyer. Someone at sometime painted the floor in the closet. Don't ask me why? but they did and now I have to remove the paint. I haven't decided yet how I am going to go about it. We also reinstalled the French door. The installation took a day longer than expected because we had to make two small pieces of trim to hold in the last piece of glass. I'll explain how we made that trim piece tomorrow because right now my pillow is calling my name. Good night.