We live in the north which means that the rain barrel will be non operational during the cold months. Our plan is to empty the barrel and move it to the garden shed during the winter. Make sure you do not leave rain water in the barrel during below freezing temperature months because once it freezes it will damage your barrel and the fittings.
Once the rain barrel is removed we will need to return to our regular down spout set up so we chose to install a downspout diverter. The diverter diverts/sends the rain water to your rain barrel instead of out the end of your down spout. Since we want to return to the original set up in the winter the diverter can simply be flipped up and the down spout will operate normally.
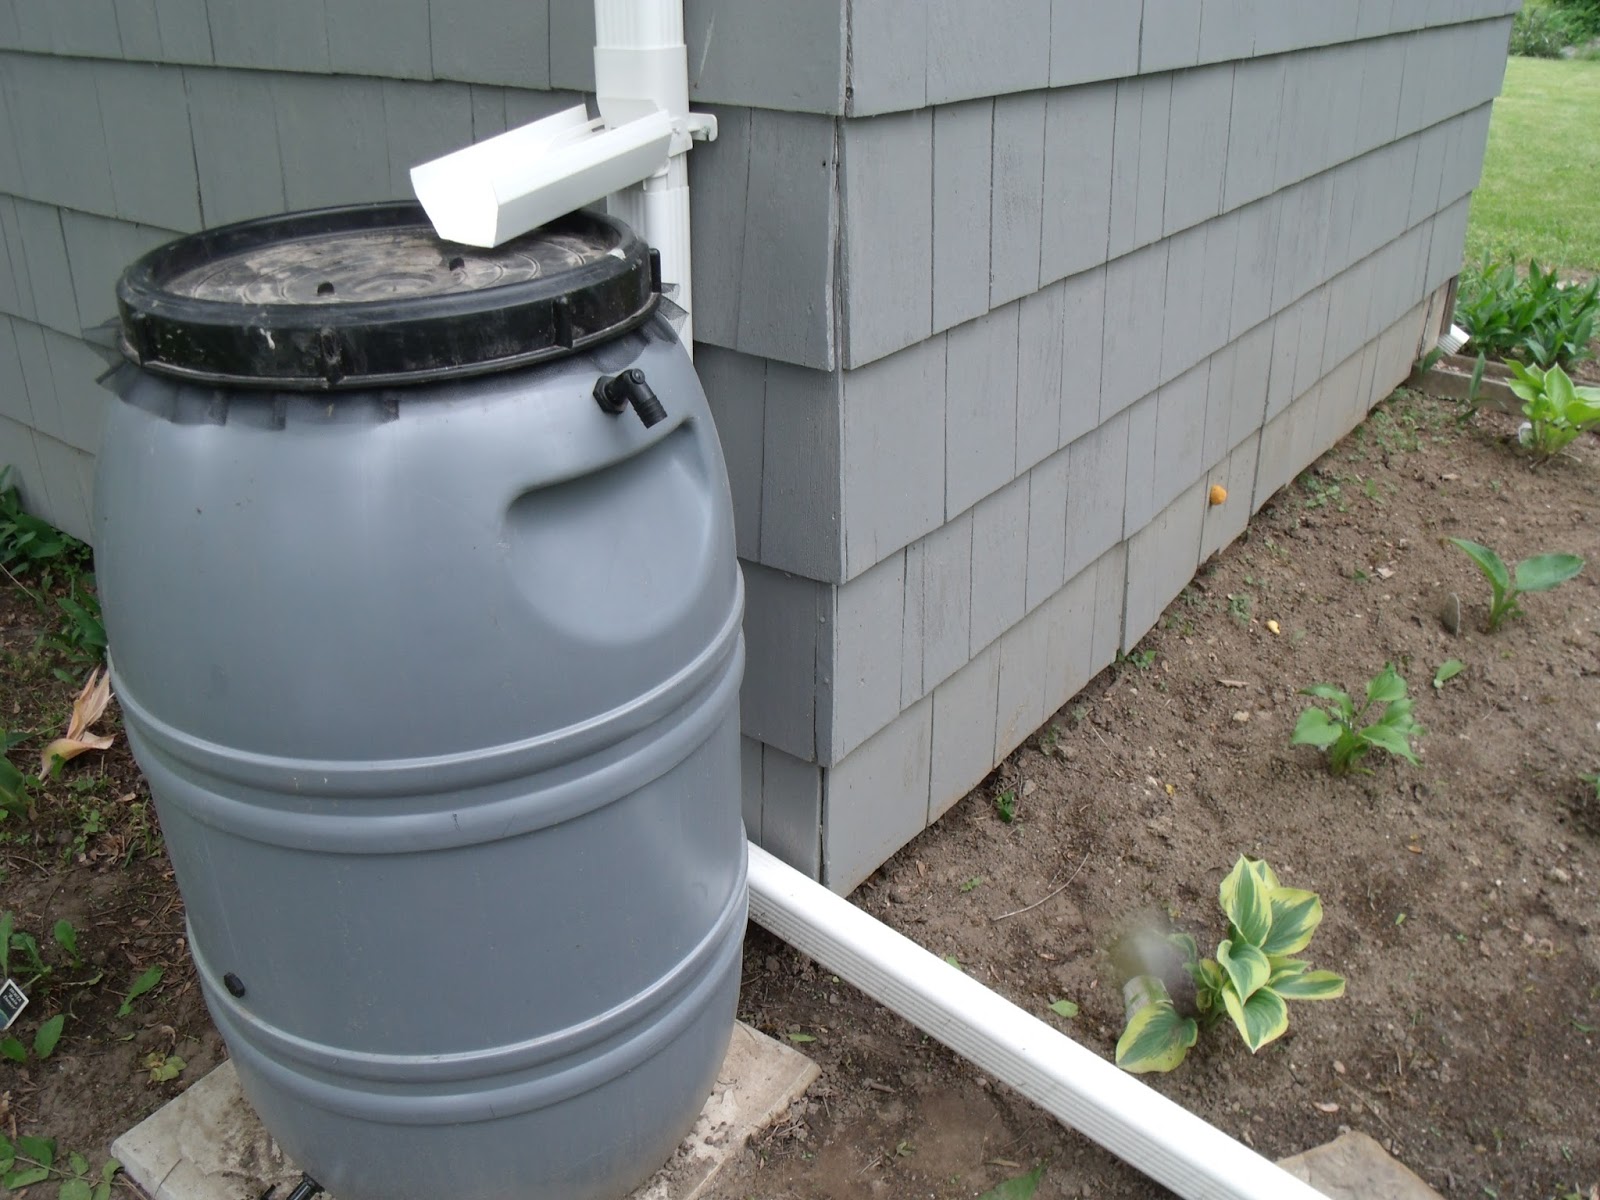
We found diverters offered in two materials, galvanized metal or white vinyl. Our down spouts and gutters are white vinyl so this was our choice. We sourced them from a company in Canada called Panon. Shipping is steep but the product cost is low. The metal diverters are expensive but shipping is less expensive so it really comes down to material choice.
The install required just a few tools and was pretty straight forward.
Pencil
Level
Screw driver
2 screws
Hacksaw
Piece of fine sandpaper
Nail punch (optional)
Determine where you need to place the diverter so that the rain water will flow into the barrel. Mark that location with the pencil. Using the level, mark a cut line across the downspout. Use a hacksaw to cut through the downspout. Use the fine grit sand paper to remove any burrs left by the hacksaw.


Slide the diverter onto the downspout. We then reattached the bottom portion of the downspout that we cut off. You may or may not need to shorten your down spout. It all depends on how close to the ground you downspout was initially. Our downspout was about 16 inches above ground level so we had plenty of room and didn't need to shorten our down spout.
Next use the level to make sure that your down spout with the installed diverter is straight. Mark the location for the screws using a pencil or in our case we used a nail punch because it gives a nice little starter hole for the wood screw we were using to attach to the wood shingles.
Install the screws or whatever fasteners you chose based on the material you are attaching your down spout to. Your diverter is now installed.

But wait....it appears that our diverter is too short or our barrel is too fat (I'm not fat shaming my barrel but just stating a fact). Now what? I thought we could add a short piece of down spout but that didn't work. I then remembered that we had purchased one of those down spout flipper things that you use to lift your downspout to mow. We cut a section off the end and slid it under the flipper part of the diverter. The diverter is held in place by the flipper part and now extends over the rain barrel.


We needed to extend the flipper part because during very light rain or after a rain storm when the roof is still shedding rain or when the gutters are slowly emptying the output is minimal and the droplets would fall off the end and down the side of the barrel or down the side of the shed and onto the ground possibly making for a damp basement (this is our pump house and has a basement).

When fall comes we will remove the added piece, put it into the empty barrel along with the attached hoses, store the barrel, and flip the diverter up and the gutter downspout system is back to it's pre rain barrel format.


Our philosophy is to keep things simple. We have found that when something is too elaborate or time consuming we just will not keep up with it despite our best intentions. Even with the hiccup this hasn't been too difficult.
Next up.....what about when the barrel is full of water and it is still raining cats and dogs?
The Panon product description says it fits 2" x 3" downspouts. Is that correct? My downspouts are 2 3/4" x 4". Will the Panon product work?
ReplyDelete