We installed the vinyl drip cap just in time for it to snow. I was hoping for rain so we could test drive the drip cap (you don't have to shovel rain) and rain has never knocked down my mail box when the county snow plow has gone by the house.
Yesterday (Tuesday) we worked on shingle installation above the drip cap until it was dark. So dark that when I tried to take a photo I had to use my flash but when I used the flash it reflected off the foil on the insulation and resulted in a photo that looked like someone was shining a flashlight at the camera. I did get a 'after' drip cap install photo but not an after shingle install photo.
We cut the drip cap to the same length as the width of the top of the window trim. The drip cap is then nailed onto the top of the trim. We used our pneumatic nailer and made sure to angle the gun towards the house so that the nail would not come through the front of the trim.
The shingles rest on top of the drip cap like this or you can install the under shingle on top of the little raised area and then the top shingle like what is shown in the photo. I installed both shingles in front of the raised area because that is how the original drip cap was installed on this house. 6 of one half dozen of another.
There is actually a double row of shingles on the drip cap. The under shingle is just the thin top part of a shingle. The top shingle is a full size shingle.
The drip cap has a groove on the bottom. This groove is there so that it breaks the surface tension and the drip doesn't wick around the edge and then behind the trim and window. You will find these drip breaks under some window sills if the sill doesn't have enough of a slope to readily shed water. FYI our new windows and our old windows have quite a slope so that isn't a problem.
Before we shingled we also needed to fill in the area above the window with rigid foam insulation. We cut a piece to fit and nailed it in place using a long nail and a fender washer. You can buy speciality nails that have a plastic washer already attached. The smallest container was $6.98 for 1 lb which was about about 30 pieces.
I needed maybe 8...10 at the most. So I bought a small package of fender washers at 6 pieces for 98 cents. I sprung for two packages and made my own .
After nailing the insulation in place we taped all the seams with a special wide foil tape that they sell to eliminate any air infiltration between sheets of insulation. The original rigid foam install did not use tape, so as we come across seams we will tape them. Cost $21.78.
Here is the after drip cap install but before shingle install. Not only does the drip cap serve a preventive purpose but it also adds just a tiny bit more of detail to the window trim. Which reminds me that..... The devil is in the details
Per
http://grammarist.com/words/devil-is-in-the-details-vs-god-is-in-the-detail/
Devil is in the details
The idiom the devil is in the details means that mistakes are usually made in the small details of a project. Usually it is a caution to pay attention to avoid failure.
An older, and slightly more common, phrase God is in the detail means that attention paid to small things has big rewards, or that details are important.
The devil version of the idiom is a variation on the God phrase, though the exact origin of both is uncertain.
So in a nutshell...if you do not install the small detail of a drip cap above your window trim you will find yourself down the road with a bigger problem of rotted windows and window trim.
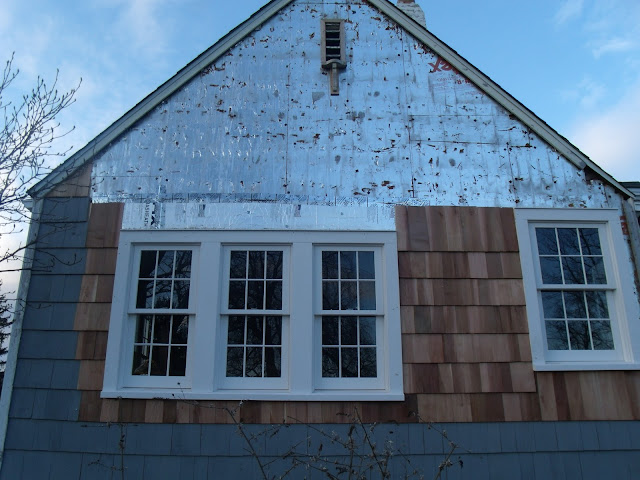
Notice the insulation installed above the window in the photo above.


No comments:
Post a Comment
Leave a comment here.....