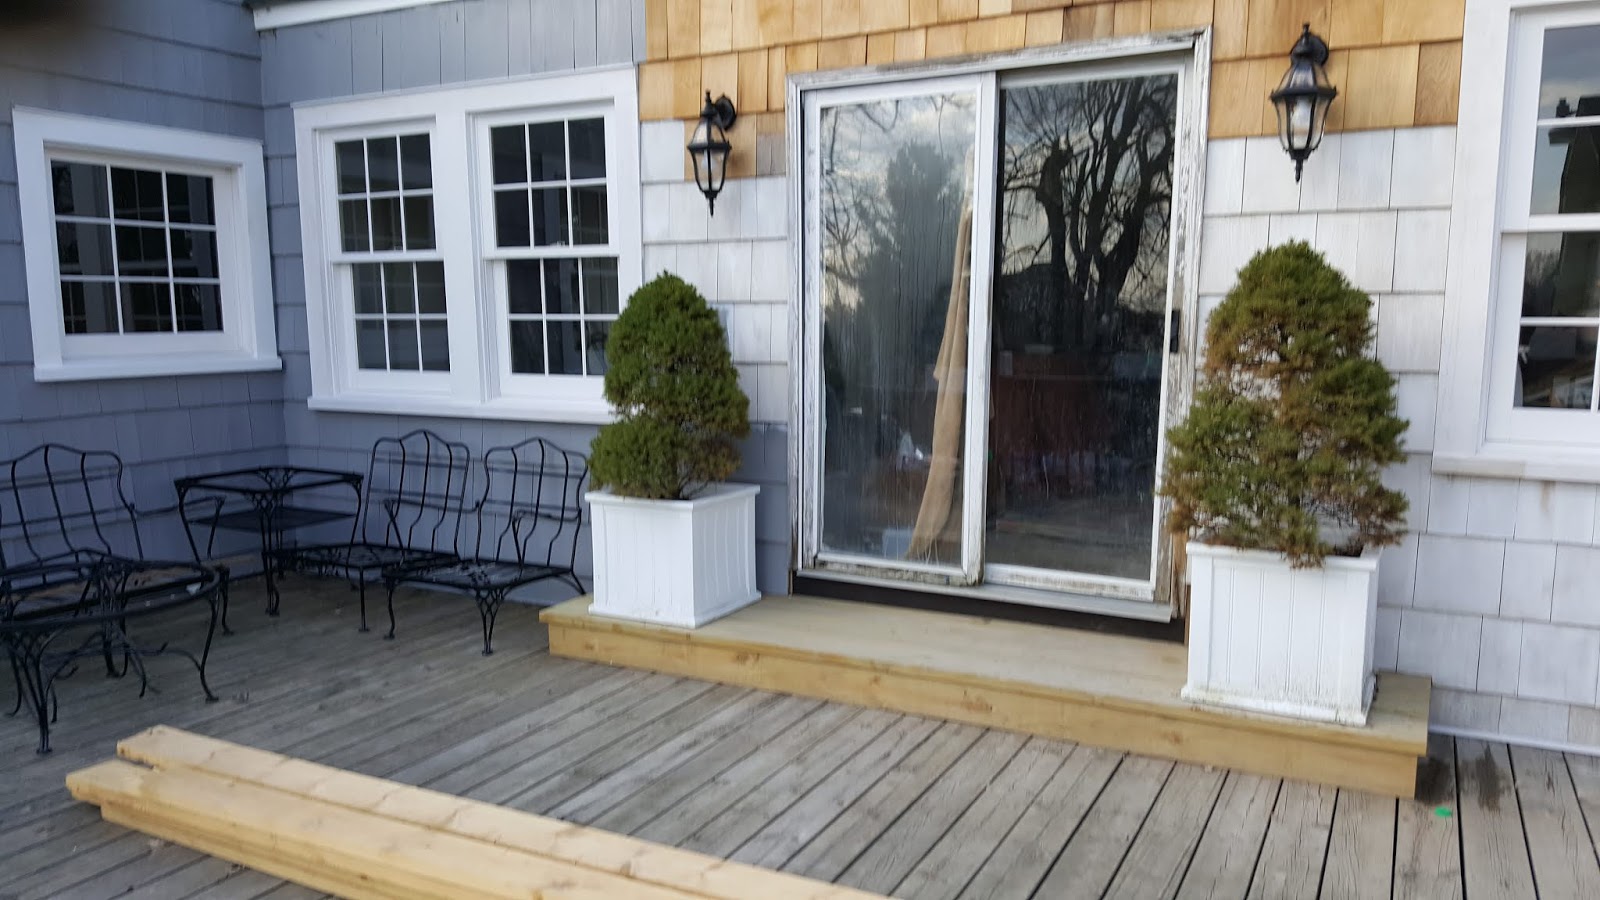
Believe it or not the southside re shingle project is complete. Seriously that last row took far too long. Photo below is R installing the last cedar shingle.
This project was more than just re shingling the southside deck area. I will try to list all the different phases in the order of completion.
We replaced the non original windows with restoration windows. I'll be honest and say this was quite the cost and thank heaven we could install them ourselves to help with keeping the cost down.
Next we reshingled around the new windows and primed and painted those shingles.
Using a mix of new and old lumber we built a large step in front of the patio door. We wanted a deep tread so that walking in and out would be easier. The deeper tread allows you to not break your stride. The step is also very wide which allows me to display pots and planters.
In conjunction with the step build we also installed two new exterior lights that match the light by the front door.
We removed the last non original window in this area and installed another double window to match the other 4 double windows. My window guy took a lot of time doing measurements of our old windows to get these new windows to look like they have always been here. The attached trim is identical to the original trim. The slope of the sill is identical and the overall size and how the windows are mullioned together is also identical.
When it comes to windows you have to take your time and do it right because inappropriate windows will look out of place and draw attention to an element not being original. These windows looked like they were installed in 1926. The last thing that we wanted was for someone to say "oh look, new windows."
Now came the most taxing part and that was removing all the old shingles on the east side, removing a huge picture window and two casement windows, installing studs and sheathing to close the opening, and removing 10 layers of various roofing materials off of the nearly flat roof over the game room.
Let's start with the cedar shingles. We started removing the old shingles and soon realised that someone had installed newer cedar shingles over the old shingles. We wondered why they did such a thing and we soon found out. Back who knows when, someone ran electrical wires (3 to be exact) on the outside of the house and under the top layer of shingles.
One wire goes from the second story over to the garden shed which is actually the original pump house for the well. Currently it has our pressure tank in the basement area of the garden shed. This wire also had a nail or two driven right through it.
Along with that wire, there was a live wire that was buried in 6 inches of tar. We were able to pull that wire down and into the basement where it is currently coiled up, shut off at the panel, and waiting to be run through conduit and become another outlet in the basement.
Now we were down to the last wire and it was from the old security system and it too was no longer active. We pulled on the wire and the other cut end came out of the wall.
The live wire that went to the pump house needed to run from the house by way of a masthead on a 2 inch OD pipe. R just happened to have a 6 ft length of thick walled aluminum pipe in a 2 inch OD size. The head, tension wire clamp, and three new wire clamps cost around 25 bucks.
We were able to cut off the area where the nails had pierced the wire due to relocating the wire from where it was attached to the second story. It now runs up from the panel in the basement, through a stud cavity, and through the first floor roof and terminates 24 inches above the roof. The tension wire was moved from the house and clamped to the mast using a new clamp. R then attached the hot and neutral wires to the hot and neutral wires attached to the tension wires and then finally the ground wires were attached and grounded.
Eventually the wire going to the pump house will run from the basement and underground to the pump house. That will not be a job we will do ourselves but one that will need to be hired out probably when we get a whole house generator installed. For now the wire running from the house to the pump house is secure and working properly.
If a tree or ice storm was to bring down the wire, it would pose no threat of fire because the live wire is located coming out of the masthead about 10 inches and a full 14 inches from the actual roof. The wire that would come down in a storm would be a disconnected and dead wire. So there would be no threat of fire on the ground or to the pump house. Running the wire underground would eliminate the threat of power loss during a storm.
We then moved on to the nearly flat roof. Oh my what an absolutely mess. I kid you not, there were 10 layers of multiple types of roofing. Most were probably installed due to a leak but each layer just added to the leak problem.
Elvis just had to see for himself. R has the "you've got to be kidding me" look on his face.
Here we go. The top layer was a rubber roof and underneath it was a layer of Homasote. Then another layer of rubber roofing and another layer of Homasote. Next was a double thickness of rubber roof with yet another layer of Homasote, then a layer of asphalt shingles, and then two layers of the original cedar shake shingles.
The original planking was rotted in places and some of the ceiling rafters were undersized and the nails pulled away due to the weight. We removed all the rafters, built up the side walls, installed 2X8 ceiling rafters in the gameroom below, 16 inch on center, and we used joist hangers to attach the rafters to the ceiling beam.
Next we salvaged what we could of the original tongue and groove planking and along with what we had salvaged from other demos so we were able to use period materials for the roof decking.
Then came the roof rebuild. The house has regular gable end design EXCEPT for this area which has a hip roof which was probably used to give more head room in that bedroom. We decided to go with the hip roof and then decide what we would do with the remaining 40 inches after the hip roof part was complete.
Originally this area was an open large back porch. Possibly a sleeping porch. I have no idea when they decided to enclose it but I can tell you that they obviously did not consult a professional.
We decided to build a gable end that fades into the existing hip roof. I looked at a lot of newer houses in the area that have multiple styles of roofs on one house and decided that this was the way to go. It was important that we kept the portions correct and not have a tall narrow peak but instead needed to be the same or close-to in portions like the other gable ends on the house.
This part took us a long time. We used brackets to attach the gable rafters to the sheathing on the hip roof. It was a difficult job with lots of angles and whenever we were in doubt we overbuilt. R said he jumped up and down and no where did he feel anything.
After the roof was sheathed, we hired a friend to roof it because we were running out of time and Christmas and snow was fast approaching. He spent a part of 4 separate days to complete it and we are very happy with the outcome. As with every project we do with this house, it was important that it looks original and we feel that it hits the mark.
It was now well below freezing as we started the last of the roof project which was install the 1X6 PVC fascia boards and the vinyl eavestroughs and downspouts. We chose the 1X6 PVC boards because they are white, as is our trim and they will not rot so there is no maintenance. Actually with the vinyl gutters the PVC board is completely covered.
We chose the larger sized gutter and downspouts (5 inch) because in some areas there was no where to add a downspout without it looking odd so the larger sized gutter helps carry away the added rain water from having less downspouts.
After the eavestrough and downspouts were installed we went back and started to fill in the missing cedar shingles on the southside while we waited for a 60X80 inch exterior french doors to arrive. The door was ordered online but we chose to pick up at the store to say a $75 delivery fee.
Installation of the door took several days to get it just right. We do better with windows but doors are trickier for us. While we cut and made the trim to match the front door using 1X6 double thickness cut down to 5 inches wide we waited for the entry door handle and deadbolt to arrive. I was lucky and was able to use a 20% off code. The brand was Emtek and the model was Franklin in a matte black with a glass doorknob inside. We also ordered a dummy handle for the stationary door so that the doors would look balanced. We haven't installed that handle yet.
Once the door trim was finished and we finished the cedar shingles around the door we decided to make wood mounting blocks for the exterior lights. We used 1X6 scrap wood glued together for thickness and then cut into 5x5 inch squares. Using a router with a round over bit we dressed the edge to look a little more finished and installed them on a 90 degree angle so they looked like diamonds.
And that is where we are today. Of course we still need to caulk, prime, and paint but the weather hasn't been warm enough for that to happen and probably won't be warm enough until the end of April.
Congratulations if you made it to the and of this post. Sorry it was so wordy.
Tomorrow we start hanging cedar shingles on the east side.
Reuse Repurpose Recycle

 Go to my Instagram account to read about how an early 1900's glass dish (above photo) was shipped to me in a bag....yes, a non padded plastic bag.