What happened? I thought cooler temps were on the way. Somebody didn't get the memo because 'oh my gosh' it was hot today. I had to wait until the exterior kitchen wall was in the shade before I could paint again.
When it is this hot, I look for small chores that are in the shade. One of those was to cut up the windows frames of the casement windows that were removed. They just needed to be cut in half so I could put them in a trash can and take them to the curb.
We then re installed the post under the deck that we removed so we could pour a new footing and piling. We used an additional bottle jack and was able to lift the corner of the house (very early addition) about 1 additional inch. The post looks great (forgot to photograph). It is straight now and not in peril of slipping off of the piling like it was before we started.
While we were under the deck we decided that we needed to add more deck joists. We took some quick measurements and made a lumber list. The span between joists are more than 16 inches because they used 2X10's. I have found that it is always best to over build a deck. We did not build this deck. Instead we have added missing elements such as joist hangers and rebuilt the steps and railing as both were ugly and not to code. The deck is huge and elevated 6 feet off the ground. By adding the extra joists, the vibration from walking should be lessen or go away.
Two days ago I mowed and then raked up the cuttings in the areas where the lawn was extra long. We picked up the cuttings today and noticed that the lawn needed cutting again. I will never finish my painting if I have to mow every three days.
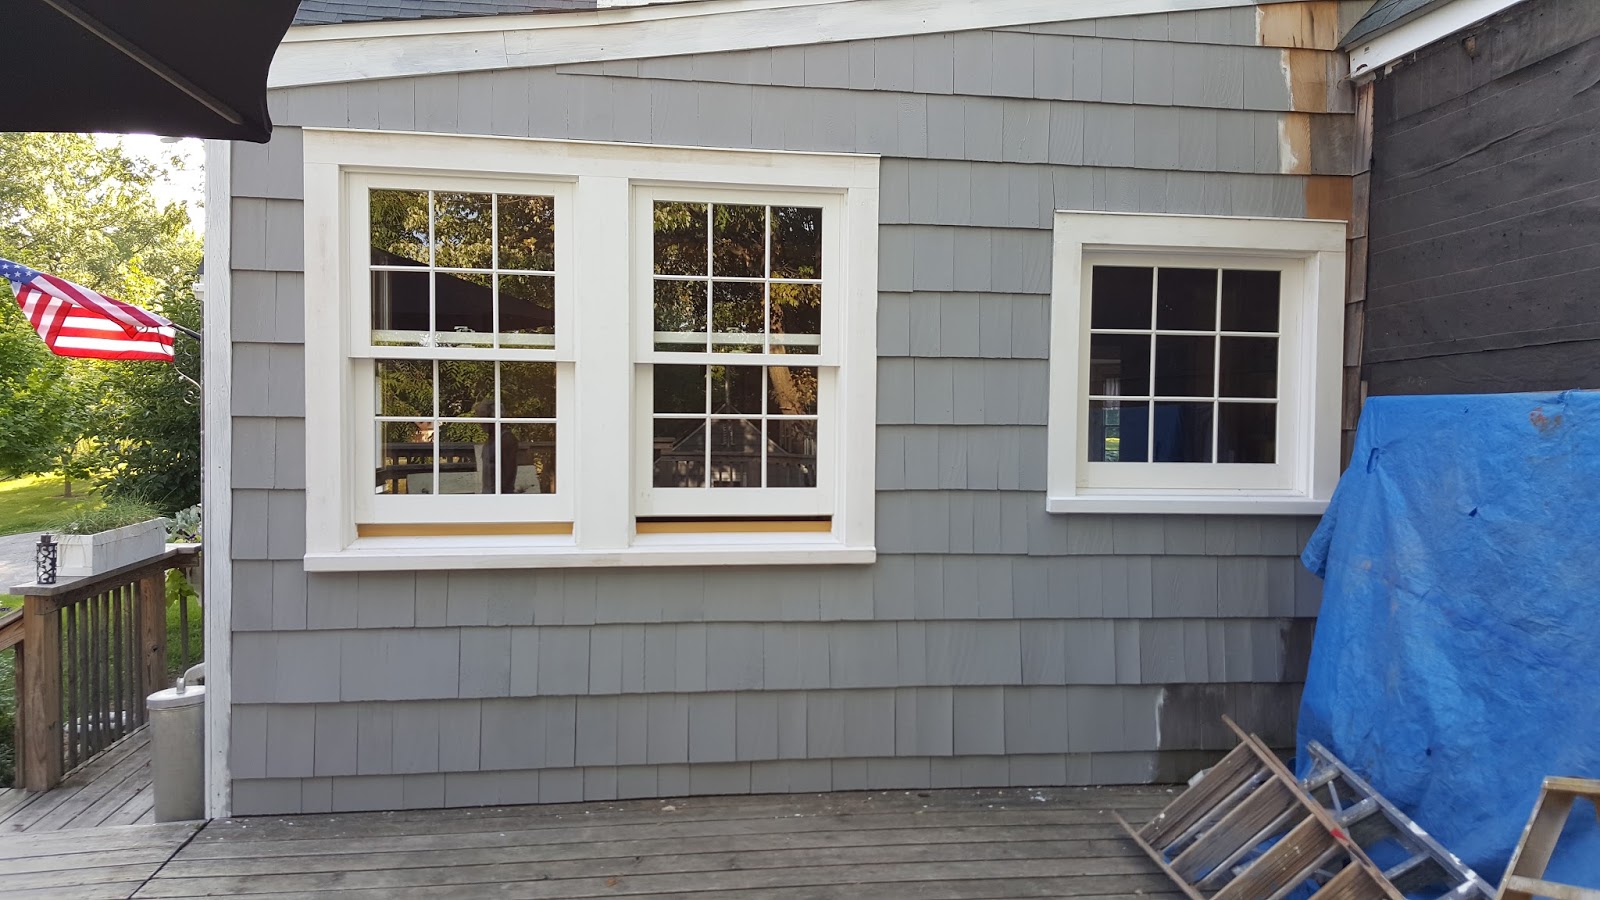
Finally around 5PM I was able to paint again. I painted with just grey today. I cannot get a ladder into the corner to finish painting until we install the two window units that are leaning up against the house.
Tomorrow is suppose to be hot but cloudy so I am hoping that I can paint the white trim. We have three days of rain coming so I need to get as much done as I can by mid afternoon.
R pulled off more old shingles today in preparation to install the next window. I told R that you know your shingles are bad when tar paper looks better than the shingles. I'm really getting antsy to show you the before photos. If you thought the before photos of the garden shed were tear down worthy wait until you see the mess we started with on this side of the house.
I was asked to pass along this casting call for a new DIY show. It doesn't apply to us but maybe you are moving into your childhood home and are getting ready to make it your own. Well then this is a perfect chance to share that experience with the rest of us. I'm nosy....I mean.....I'm interested in seeing how you pull that off.
Showing posts with label decks. Show all posts
Wednesday, September 7, 2016
Sunday, October 4, 2009
B & G's Deck in the Dark
Will it ever stop raining? Will it ever be warm again?
It was almost dark by the time it quit raining but that didn't stop us. We worked and froze in the dark.
Just about twilight time G was cutting kerf cuts into a railing post so that we can inset the support of the hand rail cap. B was sanding the edges smooth so that there are no sharp edges on any of the boards.
Once the daylight was gone we broke out the big work lights.....viola...let there be light.
The list of 'To Do' items is getting shorter. We still need to install the spindles on the two sets of steps, screw down the wide railing cap, install the hand rails caps on the steps, fill screw holes, and touch up paint.
We started work on the deck on August 4th and the temperature outside was 90 degrees and sunny. Today it was rainy and in the mid 40's. Ironic that it was nearly too hot to work on when we started and now it is nearly too cold to work on to finish.
It was almost dark by the time it quit raining but that didn't stop us. We worked and froze in the dark.
Just about twilight time G was cutting kerf cuts into a railing post so that we can inset the support of the hand rail cap. B was sanding the edges smooth so that there are no sharp edges on any of the boards.
We started work on the deck on August 4th and the temperature outside was 90 degrees and sunny. Today it was rainy and in the mid 40's. Ironic that it was nearly too hot to work on when we started and now it is nearly too cold to work on to finish.
Monday, September 28, 2009
B & G Deck Update
We are heading down the home stretch when it comes to finishing B and G's deck. We had a full crew today. B, G, B's mom, R, and myself. There was sawing, sanding, drilling, and painting for 8 hours with just a small break for pizza and to admire our work.
Here are R and G installing spindles to the left side of the deck while B and her mom notch out one of the few remaining posts.
B and her mom sitting on the steps. Additional seating was one of the reasons for installing extra wide steps on the deck. Looks like the steps are doing what they were designed to do.
B spent most of the day filling screw holes, patching bad spots, and touching up paint. Here she is touching up one of the posts. Notice the railing cap we installed just before we called it quits for the night. We still need to trim the end off but it was getting late and we needed to install the remaining cap boards. We used a biscuit joiner on the 45 degree cuts on each corner. We added several long screws to secure the two pieces together after installing the biscuits . We clamped them to made sure they do not move until the glue dries. Once it stops raining, G will finish screwing down the cap and cut off the ends allowing for a 2 inch overhang.
All that is left to do is install the remaining three step posts, build the railings for the steps, and install the spindles on the steps. When that is complete, B and I will install the remaining 3 exterior lights. That should be an all day job at the rate it took us to install three lights the last time.
I promise to take better photos next time. These photos all seem tilted for some reason. I swear I was just drinking diet Coke, too.
Added at 1PM...I was driving into Fenton this morning and realized I could stop and snap a few better photos of the deck.

The forecast for the next three days is rain and high winds. Welcome to fall....fall that 3 week time period before the six months of winter. Grrrrrr
I promise to take better photos next time. These photos all seem tilted for some reason. I swear I was just drinking diet Coke, too.
Added at 1PM...I was driving into Fenton this morning and realized I could stop and snap a few better photos of the deck.
Monday, September 21, 2009
B & G's Deck Update + Racing Announcement
Today was the day everyone was looking forward to........we started the railing installation.
Here is a photo of B and G making sure everything is on the level.

We used two 8 inch long carriage bolts to attach each post. The photo below is of R using a ratchet and socket to tighten the nut on the back side of the rim joist. We used 8 inch long bolts because we needed to go through two thirds of a 4 X 4 and one 2 X 8 and one 2 X 10. Next spring G will re tighten the nuts after the deck goes through a winter and the lumber shrinks even more.
There's those shorts again!!!!!
Just as dusk fell and after the posts were installed on the perimeter of the deck we started to install some the 2 X 4's that join the posts together to form the railing. A 2 X 10 will cap off the railing. The spindles will be square 2 X 2's.
In the photo below the railing looks rather tall but believe me when I say it is not...I am just short.
Notice how the patio door blinds are open at the bottom.....that's Twiggy making sure everything is done to spec, I think she's undercover for the building inspector.
Next on the agenda for the deck is to make 4 additional posts for the step railings, finish all the 2 X 4 installation, install 2 X 10 cap, cut spindles to length, install spindles, and touch up paint.
In racing news.....R finished his first season racing a sprint car in the MTS Series. He accumulated enough points to finish the season in 10th place and also at age 57 won Rookie of the Year honors. I guess this retiree isn't sitting home in a recliner watching TV. The trick is to stay active. Here is a photo of the happy guy today as he was taking the car apart to power wash it.
Speaking of retirees.....my newly retired sister has taken to writing letters to the editor of The Flint Journal newspaper. Seems one of Flint's favorite columnists, Andrew Heller, made a statement concerning the advertised mpg of his new GM vehicle and she had to set him straight.
Added 9-24-09 Seems Andy felt the need to pull that particular column. Maybe the formidable Marcia smacked him upside the head and said "Dumb Andy dumb."
And just for your FYI, the advertised mpg is the average after the engine is broken in. You may or not get that mileage right away. Remember with a new engine everything is tight because of the close tolerances that are used today. Tight equals friction, friction equals heat, heat equals less efficiency. When purchasing a brand new vehicle it is best to get an oil and oil filter change after 3k miles and after that change to every 5k for fossil oil and 7-10k for synthetic oil. Also unless the vehicle came equipped with synthetic oil, use fossil oil for the first 10k miles before switching to synthetic oil. DO NOT SWITCH TO SYNTHETIC on an engine with a lot of miles on it, you will be wasting your money and you could develop oil leaks.
All vehicles in this household have always used synthetic oil once they were broke in. Our vehicles have 260k, 430k, 330k, 8k miles on them. Who says GM vehicles don't last? The vehicle with 8k came with Mobil One and says to use Mobil One only because it was designed (due to the coating on the piston of this high compression engine) and tested to use only Mobil One. My husband uses Mobil One in all his vehicles and I use Valvoline full synthetic in mine. I think synthetic is the only way to go. It is more expensive (roughly twice the cost) but you can get twice the miles and it saves non renewable oil for more important uses. So I guess you could say synthetic oil is green.
In NASCAR news...The Chase has started. Tony didn't have a great day but it could have been worse. He had to pit to replace an axle cap. That is kind of an odd problem and usually a sign that you have damaged the axle spline from spinning the tires before they hit the ground when you are coming down off the jack. Tony still finished on the lead lap.
At the beginning of the season I joined the fantasy racing league on the Pepsi site. I am currently ranked 999th out of 55,980. I did pretty good this week and should move up a little when they tally the points from today's race.
So let me get this out of the way......Gooooooo Smoke!!!!! Good luck in The Chase.
Here is a photo of B and G making sure everything is on the level.
Just as dusk fell and after the posts were installed on the perimeter of the deck we started to install some the 2 X 4's that join the posts together to form the railing. A 2 X 10 will cap off the railing. The spindles will be square 2 X 2's.
In the photo below the railing looks rather tall but believe me when I say it is not...I am just short.
Notice how the patio door blinds are open at the bottom.....that's Twiggy making sure everything is done to spec, I think she's undercover for the building inspector.
In racing news.....R finished his first season racing a sprint car in the MTS Series. He accumulated enough points to finish the season in 10th place and also at age 57 won Rookie of the Year honors. I guess this retiree isn't sitting home in a recliner watching TV. The trick is to stay active. Here is a photo of the happy guy today as he was taking the car apart to power wash it.
Added 9-24-09 Seems Andy felt the need to pull that particular column. Maybe the formidable Marcia smacked him upside the head and said "Dumb Andy dumb."
And just for your FYI, the advertised mpg is the average after the engine is broken in. You may or not get that mileage right away. Remember with a new engine everything is tight because of the close tolerances that are used today. Tight equals friction, friction equals heat, heat equals less efficiency. When purchasing a brand new vehicle it is best to get an oil and oil filter change after 3k miles and after that change to every 5k for fossil oil and 7-10k for synthetic oil. Also unless the vehicle came equipped with synthetic oil, use fossil oil for the first 10k miles before switching to synthetic oil. DO NOT SWITCH TO SYNTHETIC on an engine with a lot of miles on it, you will be wasting your money and you could develop oil leaks.
All vehicles in this household have always used synthetic oil once they were broke in. Our vehicles have 260k, 430k, 330k, 8k miles on them. Who says GM vehicles don't last? The vehicle with 8k came with Mobil One and says to use Mobil One only because it was designed (due to the coating on the piston of this high compression engine) and tested to use only Mobil One. My husband uses Mobil One in all his vehicles and I use Valvoline full synthetic in mine. I think synthetic is the only way to go. It is more expensive (roughly twice the cost) but you can get twice the miles and it saves non renewable oil for more important uses. So I guess you could say synthetic oil is green.
In NASCAR news...The Chase has started. Tony didn't have a great day but it could have been worse. He had to pit to replace an axle cap. That is kind of an odd problem and usually a sign that you have damaged the axle spline from spinning the tires before they hit the ground when you are coming down off the jack. Tony still finished on the lead lap.
At the beginning of the season I joined the fantasy racing league on the Pepsi site. I am currently ranked 999th out of 55,980. I did pretty good this week and should move up a little when they tally the points from today's race.
So let me get this out of the way......Gooooooo Smoke!!!!! Good luck in The Chase.
Sunday, September 6, 2009
B & G Deck Update
Progress has been slow and steady on B & G's deck. I was going through older photos and noticed that the date on the photo of R installing the first board was August 4th. So despite the heat and mosquitoes I think we are making pretty good progress.
B & G stained the deck boards last week and it looks great. Several days ago we installed the wider rim joist to hide the original narrow rim joist. We countersunk a 1/2" diameter hole a 1/2" deep before installing long deck screws to hold the rim joist in place. After we installed the long deck screws we inserted a 1/2" cap plug into the hole but not before squeezing a little wood glue into the hole. I think this looks more finished than just installing screws and having the screw head exposed.

B pre stained all the wood prior to installation. Today she was washing our dirty finger prints off of the wood in preparation for some touch up work.
The photo below is of R doing his imitation of a clamp by standing on the end of a board while G cuts a new stringer.
Tomorrow we will start fabricating the posts. After much deliberation we all agreed upon a railing height. Not too tall and not too low but just right.
I just noticed that R has on those shorts again!!!
B & G stained the deck boards last week and it looks great. Several days ago we installed the wider rim joist to hide the original narrow rim joist. We countersunk a 1/2" diameter hole a 1/2" deep before installing long deck screws to hold the rim joist in place. After we installed the long deck screws we inserted a 1/2" cap plug into the hole but not before squeezing a little wood glue into the hole. I think this looks more finished than just installing screws and having the screw head exposed.
The photo below is of R doing his imitation of a clamp by standing on the end of a board while G cuts a new stringer.
I just noticed that R has on those shorts again!!!
Wednesday, August 19, 2009
Mosquitoes Slow Our Progress
Progress at 'The Gear' has been slow for several reasons. One being the deck redo at B & G's and the other being the mosquitoes. They are huge. They are everywhere. They swarm. They are persistence. I think I am a pint low in the blood department. I have welts all over my arms and legs. I even have one on my eye lid and cheek. Good thing the township sprays for mosquitoes. LOL
Prior to the mosquitoes running me off, I was able to make some progress on the walkway to the fountain. At one time the walkway was lined with little stones. Over the years grass has grown into the rocks obscuring them from anyone knowing they were there. It was only my attempt to the edge the walkway that I found out that under the grass laid little itty bitty stones EVERYWHERE.
Every spring I rake up piles of little stones. I found that they work great at protecting my miniature hostas. An idea was born. Not only could I protect my hostas but I could return the walkway to the way it was years ago.
I used 2 round stepping stones (already had from Torrey Rd house) so that we will not have to step in between the hostas. I also surrounded the small stones with large rocks hoping that they will keep the little stones from straying.
I'll be planting more miniature hostas along the entire length of the walkway. We need to center the cement bench (bench was found in a pile of dirt and brush).
I will be planting Royal Standard hostas around the tree. I like Royal Standard for several reasons. First they have large white flowers. Second they are hardy. Third they are free as I have an abundance of them already.
I will be relocating the second stepping stone. I wasn't sure exactly where it needed to go so I just took a stab at the correct location. Once I started laying down the larger rocks I could see that it needs to be closer to the bench.
Just about the time I took this photo the mosquitoes swarmed and I was slapping and spinning around like a whirling dervish so I stopped and went to B & G's.
Last night I installed temporary steps by the garage entry door because I knew that today I would be removing the steps on the other side of the deck.
We decided last week not to reinstall the steps. Instead we will build 6 foot wide steps here. See photo below.
The steps will be centered. Barbara's Mom was the one who suggested we move the steps. Barbara had all along wanted places for people to sit. We had an 'ah ha' moment and that is how the 6 foot wide step idea was born.
The mosquitoes heard I was at B & G's and soon after taking these photos I was swarmed yet again. So I went home.....welt covered and itchy.
Prior to the mosquitoes running me off, I was able to make some progress on the walkway to the fountain. At one time the walkway was lined with little stones. Over the years grass has grown into the rocks obscuring them from anyone knowing they were there. It was only my attempt to the edge the walkway that I found out that under the grass laid little itty bitty stones EVERYWHERE.
Every spring I rake up piles of little stones. I found that they work great at protecting my miniature hostas. An idea was born. Not only could I protect my hostas but I could return the walkway to the way it was years ago.
I'll be planting more miniature hostas along the entire length of the walkway. We need to center the cement bench (bench was found in a pile of dirt and brush).
Just about the time I took this photo the mosquitoes swarmed and I was slapping and spinning around like a whirling dervish so I stopped and went to B & G's.
Last night I installed temporary steps by the garage entry door because I knew that today I would be removing the steps on the other side of the deck.
The mosquitoes heard I was at B & G's and soon after taking these photos I was swarmed yet again. So I went home.....welt covered and itchy.
Sunday, August 9, 2009
B & G's Deck Redo
When Barbara and Gavin (son and daughter in law) purchased their home several years ago the deck was incomplete and in very rough shape. This summer B & G asked for our assistance in revitalizing the deck while still keeping the costs low.
B and I discussed deck details while installing new lights on the front of their house in late spring. Ranee (my sister) and I found these new lights at the Battle Creek Restore. I called B and told her about the lights and she said 'buy them' so we did. They needed 4 large lights and 2 small. Here is a photo of B installing one of the small lights by her front door.

B and I were able to install 1 small and 2 large in 10 hours. LOL Let me add that we had to remove old light, remove old light back trim, lay out template for new vinyl trim, use Dremel to cut siding, install trim, and then wire and install light. What a job that was. We also added 2 large lights on each side of their garage door. B won't be quitting her day job and I will not be leaving retirement soon to start a new career as a light installers.
We also purchased enough lights to have large lights on each side of the patio door and a small light by the garage entry door. The patio lights will require adding an additional box since the patio currently only has 1 light.
After days of calculating B & G decided to replace the deck boards with new wood deck boards using the same type of 5/4 boards. They asked friends and colleagues how they built their decks and were surprised to hear a lot of negative comments about Trex so they decided to stick with wood.
First we removed the one small remaining section of railing and all the deck posts (can't find the before photos). Once that was completed B & G removed all the old deck boards. B's brother will use them to build onto their 4 sons tree house...I mean 'fort'.
B & G made one massive trip to Home Depot and purchased all the decking, new rail posts, square spindles, new 2 X 12 rim joists to cover up the 2 X 6 currently in place, opaque stain, dark transparent stain for the deck boards, joist hangers (because the deck was originally built w/o any), and torx drive deck screws.
B started staining the exposed joist ends and exposed support posts with the opaque cream stain. We decided that an opaque stain the same color of the house would make the deck look like an extension of the house and not an add on. The railing and step stringers will also be the same opaque cream color.
R and I spent a couple hours arranging the deck boards so that we could eliminate as many cracks and knots as possible. We also placed all the deck boards so that the crown was on top to help eliminate cupping as the boards age. But before we started, R cut of the joists that extended beyond the rim joist. Only about 2 inches of the joists will be exposed when we add the 2 X 12 rim joist.
The plan is to screw down 10 boards a day. I know that doesn't sound like a lot but let me tell you it takes a good 2-3 hours. There are 52 deck boards so we should have our part done before next weekend when B & G take over and stain the deck boards. Once that is complete R and I will install the painted 2 X 12 rim joist.
Here is B helping to hold a deck board in place while her father in law screws it in place. Note the one light box on the right side of patio door. We will add another to the left side so that they will have 2 lights for more light coverage on the deck.
The plan is to complete the deck by the end of August. Anyone care to wager whether 2 working professionals and 2 retirees will complete this deck by the end of August? Remember we have to factor in races, rain, heat, age, doctor appointments (we are falling apart), dentist appointments, lack of interest, aches, and pains.
Today R and I will venture down the road to install 10 more boards which will get us near the halfway point. B & G on the other hand have gone sky diving. Actually B is diving and G is watching. Don't worry, Twiggy the cat, will watch our every move while they are gone.
Here a gratuitous photo for all you gear heads. This is B & G inside of G's race shop. R is inspecting his new 410 engine for his sprint car, while it is still on the engine hoist (pick).
Here is an up close photo of something interesting. This is a 3 stage oil pump (center of photo), to the left is the oil filter, and to the right is the large oil reservoir. Each stage increases the oil pressure. A normal passenger car has oil pressure between 60 and 80 PSI (pounds per square inch). This engine will have.......oops no one is home for me to ask......well lets just say...a lot. I'll get back to you with the real PSI when I can verify my data.
Added at 6 PM Sunday....OK...here's the scoop....not only does it increase oil pressure but it allows the engine to use large volumes of oil, thus keeping all parts lubricated despite centrifugal force caused by racing on a banked oval track at a high rate of speed (don't ask me how fast because Grandma reads this and she would worry). The large reservoir has a spiral baffle system that allows the oil to rid itself of air bubbles due to the increased oil pressure. Air bubbles displace oil thus less lubricating is taking place. Friction is the enemy when it comes to engine wear. Friction causes wear and friction causes heat which cause parts to swell and when they swell they wear and so the vicious circle goes. That's why it is always important to read your temperature gauge on your instrument panel. It's important to know what your nominal (normal) operating temps and oil pressure are for your vehicle, that way you can tell if you have a problem starting. There is absolutely no reason why you cannot get 250k to 300k miles out of your engine. In this day and age your engine is still new at 100k......that's your engine...not accessories. Accessories like power steering, alternator/generator, and belts can all be replaced by the owner. AC compressors and AC systems should be relegated to trained and certified personnel due to the freon in the system.
Happy Birthday Ranee!!!! I won't tell you how old she is...but she is reaaaaallly old. LOL
Goooooo Smoke!!! Good luck at Watkins Glen.
B and I discussed deck details while installing new lights on the front of their house in late spring. Ranee (my sister) and I found these new lights at the Battle Creek Restore. I called B and told her about the lights and she said 'buy them' so we did. They needed 4 large lights and 2 small. Here is a photo of B installing one of the small lights by her front door.
We also purchased enough lights to have large lights on each side of the patio door and a small light by the garage entry door. The patio lights will require adding an additional box since the patio currently only has 1 light.
After days of calculating B & G decided to replace the deck boards with new wood deck boards using the same type of 5/4 boards. They asked friends and colleagues how they built their decks and were surprised to hear a lot of negative comments about Trex so they decided to stick with wood.
First we removed the one small remaining section of railing and all the deck posts (can't find the before photos). Once that was completed B & G removed all the old deck boards. B's brother will use them to build onto their 4 sons tree house...I mean 'fort'.
B & G made one massive trip to Home Depot and purchased all the decking, new rail posts, square spindles, new 2 X 12 rim joists to cover up the 2 X 6 currently in place, opaque stain, dark transparent stain for the deck boards, joist hangers (because the deck was originally built w/o any), and torx drive deck screws.
B started staining the exposed joist ends and exposed support posts with the opaque cream stain. We decided that an opaque stain the same color of the house would make the deck look like an extension of the house and not an add on. The railing and step stringers will also be the same opaque cream color.
R and I spent a couple hours arranging the deck boards so that we could eliminate as many cracks and knots as possible. We also placed all the deck boards so that the crown was on top to help eliminate cupping as the boards age. But before we started, R cut of the joists that extended beyond the rim joist. Only about 2 inches of the joists will be exposed when we add the 2 X 12 rim joist.
Today R and I will venture down the road to install 10 more boards which will get us near the halfway point. B & G on the other hand have gone sky diving. Actually B is diving and G is watching. Don't worry, Twiggy the cat, will watch our every move while they are gone.
Added at 6 PM Sunday....OK...here's the scoop....not only does it increase oil pressure but it allows the engine to use large volumes of oil, thus keeping all parts lubricated despite centrifugal force caused by racing on a banked oval track at a high rate of speed (don't ask me how fast because Grandma reads this and she would worry). The large reservoir has a spiral baffle system that allows the oil to rid itself of air bubbles due to the increased oil pressure. Air bubbles displace oil thus less lubricating is taking place. Friction is the enemy when it comes to engine wear. Friction causes wear and friction causes heat which cause parts to swell and when they swell they wear and so the vicious circle goes. That's why it is always important to read your temperature gauge on your instrument panel. It's important to know what your nominal (normal) operating temps and oil pressure are for your vehicle, that way you can tell if you have a problem starting. There is absolutely no reason why you cannot get 250k to 300k miles out of your engine. In this day and age your engine is still new at 100k......that's your engine...not accessories. Accessories like power steering, alternator/generator, and belts can all be replaced by the owner. AC compressors and AC systems should be relegated to trained and certified personnel due to the freon in the system.
Goooooo Smoke!!! Good luck at Watkins Glen.
Subscribe to:
Posts (Atom)


