Showing posts with label gear acres. Show all posts

Friday, October 23, 2020

A Whole Lotta Free Pavers

 In the beginning of August we had to stop work on clearing the new land to go and pick up a whole lot of free pavers.  Of course it was 90 degrees and they needed to be gone ASAP.  

It took us 3 days of working in 90 degree temperatures and sometime rainy weather to get them all removed from where they were located.  It then took us another three days to empty two trailers and two pickup trucks full of pavers.
Roger loaded up the bucket on the tractor with the pavers and then carefully dumped them on the ground behind the barn.  Then I would stack them on pallets.  We already had a small pallet of this style of pavers but with the added pavers we can do a much larger project.  More about the project in the next post.
There were several styles of pavers.  First there were the whole pavers like in the photo above.  Then there were factory half pavers that were basically a whole paver cut lengthwise.  Then there were miscellaneous cut pavers and retaining wall pieces.  Each style went on a separate pallet.
Laying down the first layer is important because you have to make sure to span the open area between the boards so that the paver doesn't fall through.  Then each layer after that is rotated 180 degrees so that you don't form tall towers of pavers that could loosen and fall away.  This way it is all held into place by the layer below and above. 
By this time, my fingers were hurting and because I do not wear gloves, except when working with sheet metal,  I found my hands were getting smooth callouses on my fingers and I also think my finger prints were ground away.
When all was said and done we have 3 large pallets of whole pavers,  one smaller pallet of half pavers and pieces, and a small pallet of retaining wall pieces.  We also have between 30 and 40 16X16 patio slabs and 30 10X16 grey concrete slabs that we plan to use to make a path through a large hosta bed planned for an area of dense trees.  

I was so happy when I laid that last paver.  When I injured my wrist last year when my flip flop fell apart and I fell on my hand, I ended up with several crooked fingers.  I am pleased to say after picking up and laying down over 2400 pavers that my fingers are now straight.  My fingernails look horrible but the fingers are straight.

The next post will be about what we are going to do with these pavers.  So until then remember to...

Reuse Repurpose Recycle

Friday, February 14, 2020

Grandmother's Tuna Salad Recipe and Update

My paternal grandmother made the best tuna salad and she always served it in a hobnail moonstone bowl.  Reminder to self....search the Internet for 'The Bowl'.  For years we have been trying to crack the recipe and I think I have finally done it.  
My daughter in law came very close in the winter of 2018.  But I think that it was just one ingredient off and that one ingredient was Miracle Whip instead of mayo.  I always felt like the tuna salads we were making looked too yellow.

  My grandmother's philosophy was that there was nothing that couldn't taste better with a little sour cream added.  AND if it was something sweet she was of the mind that peanut butter could make it better.  Her peanut butter Rice Krispies  treats were very tasty.

But back to sour cream, Miracle Whip, and tuna salad.  We are a Hellman's household and there isn't a jar of Miracle Whip in the house but one day it dawned on me that Miracle Whip was the cat's meow in the 50-60's. AND Miracle Whip is WHITER than mayo.  So last week I tried the recipe again with Miracle Whip and it looks and taste like my grandmother's.

Grandma Brunette's Tuna Salad Recipe

2 cans of chunk tuna in oil NOT water. Must be chunk and in oil, drained (do not rinse). 

shell pasta approximately 1 1/2 cups uncooked (the photo shows shell and elbow because I ran out of shell) 

celery 2 or 3 stalks sliced lengthwise and then diced into 1/2 inch pieces.  Any bigger and you start getting those celery strings caught in your teeth.  

1/4 to 1/2 white sweet onion diced into 1/2 inch pieces, must be sweet onion or the onion taste will over power the other ingredients

frozen peas 1/2 to 3/4 cup

1/4 to 1/2 teaspoon salt, we always salt lightly

Miracle Whip

sour cream

OPTIONAL dill weed just a dash or two

Garnish with paprika.  She ALWAYS garnished everything with paprika.

Cook the pasta until al dente.   Drain and rinse with cold water.  If you do not rinse the shells they will stack inside each other (been there, done that). Drain and place in a large covered bowl,  and put in fridge to get cold.

While cooking the pasta you can dice your celery, onion, and thaw out your peas.  

Don't mix together any of the ingredients until everything is cold.  Add the drained tuna to the pasta and break apart the chucks into flakes and mix into the pasta.  Now add the rest of the ingredients and look for any shells that might be sticking together and separate them.

In a small bowl mix 1/4 cup Miracle Whip, 1/4 cup sour cream, and salt.  If you are adding dill weed this is the time to add it to the dressing mix. 
Add half the dressing and mix lightly so that the tuna doesn't fall apart.  If salad is too dry then add more dressing.  The photo above is how I like my tuna salad.  If you want more dressing then add more.  Just don't add it all in the beginning.  It is much easier to get to the correct amount of dressing by slowly adding.  Once you have made the salad a couple of times you will know the correct amount to add right from the beginning.

Garnish with a couple of light shakes of the paprika jar.  This is just for looks and was always how my grandmother presented her tuna salad at the table.

Now comes the most important part.  Cover the bowl with plastic wrap and place in the fridge for 12 hrs.  I have found that if you don't wait, the tuna flavor will be too strong.  I don't know why, but it is.  

Oh and while I am talking about tuna, do not buy tuna in water or tuna pieces.  It is tasteless and the pieces are so small that it is more like tuna slime and not tuna flakes. 

ENJOY

Update....we haven't embarked on any interesting projects of late.  But we have a long list to start on when the weather breaks.

  We did a massive tree trimming and shrub removal at the Torrey Road house in preparation for when we put it on the market.  

We installed a 3rd gen Nest thermostat in the Torrey Road house and I will do a tutorial in the coming weeks.

I also made a great potato soup recipe the other day and I will do a post about that recipe along with my sister's crock pot potato soup recipe which is to die for.  

I am also planning on writing a blog post about how we sold 2 properties (FSBO) without an agent.  One property sold for 10K under asking but 40K more than properties adjacent to it.  The other sold for asking on the second day even after the first buyer's agent told me to lower the price.  The property sold for 35K over identical other properties and it is still the highest selling condo in the area.

I am thinking about writing a post on my fave YouTube channels.  I watch some unusual ones that if someone told me I would watch these in 2020, I would have to say 'No way'. Hint there are kitties involved and maybe a dog or two.  

If any of these future posts sound like something you are interested in, just subscribe to my Instagram account where I will post whenever there is a new post on the blog.  


Reuse Repurpose Recycle


Sunday, March 17, 2019

Cedar Shingle Update

We have just two rows left to install but the best part is that we no longer have any of the fussy cuts to mess with just basic straight cuts.  Yahoo!
Tomorrow morning (Monday) we have to make a dump run to get rid of the last 4 non original windows.  I am so over looking at them leaned up against the house.  Goodbye, so long, farewell, au revoir, auf wiedersehen, and sayonara.  You won't be missed because you never should have been installed in the first place.

The weather forecast is for no rain or snow ALL week.  So we have no excuse not to finish the shingles on the southside of the house.  We really are antsy to get the east side shingled so that we can hang the secret project up.  You can subscribe to our Instagram page for updates on the secret project and to follow along in between posts.

Follow us on Instagram at Gear Acres 

If you don't live in this area (MI) you may not know that earlier in the week this part of MI experienced several tornadoes.  I think that the last I heard was 60 or 70 houses were damaged or destroyed.  The temperature was 59 degrees which is odd for a tornado.  We worked outside all day and I had mentioned to R that one minute it was blowing from the south and then the next minute it was blowing from the west.  The skies were getting dark so we called it quits about 530pm.

I went inside and was on the computer when my phone went off with a tornado warning alert.  I actually thought it was a mistake until the sirens started blaring.  So I turned on the TV to a local channel and sure enough there was not one but 2 tornadoes on the ground.  

They missed us but one was heading in the direction of my sister's house.  She doesn't have a basement because her home was built on the foundation of a old farm house.  I called her and warned her.  She is a labrador dog breeder of show doggies so she rounded them up and put them all in their crates and then watched the skies.  I think she said the tornado went just south of her by about a mile.  I really must take some photos of her house.  They did an attached kennel that blends right into their house and future owners could use it as an office or beauty salon.  It has an attach courtyard with wrought iron fence around it.  It is really a clever design.

This is the time of year where we need to think about birds, butterflies, and bees AND what we can do to increase their populations. 


I purchased a large bag of dried mealworms last week and already the woodpeckers have found the mealworm feeder.  We also noticed that the red winged blackbirds are back and that is usually a sure sign of spring.  During the winter we use sunflower seeds and thistle in our feeders.

Last week we also purchased a replacement top for a concrete bird bath base that was given to us last year.  Birds like a shallow basin that holds about 2 or 3 inches of water.  Don't confuse bird baths with fountain basins.  Fountains basins are far too deep and the birds can't splish splash around without drowning.

We have 8 concrete bird baths that are located around our 2 acre lot.  They see a lot of action especially when it hasn't rained for a while.  The birds both bathe and drink from these basins so it is important to keep the water fresh.  This not only keeps the birds healthy but will bring in more birds that are in search of drinking water during times of less rainfall.

Happy St Patrick's Day
May the road rise to meet you, and the wind always be at your back. May the sun shine warm on your face and the rains fall softly on your fields.

Reuse Repurpose Recycle

Friday, June 29, 2018

Prepping and Spray Painting Garden Stool and Candle Holders

This evening I spray painted the garden stool and candle holders in black with a satin finish. The photo below is the before photo.
Whenever I spray paint anything I always do the underneath and the bottom edge first.  This way I do not mess up the paint on the top when I flip it over.  I noticed that most bloggers spray the top first and I can never understand why.
While the inside and the bottom edge of the garden stool dries I moved on to the candle holders.  These needed a little prep first but nothing a little sand paper couldn't fix.  It was mostly rust and what looked like the remains of a felt pad on the feet of the holders.
I, of course, started with the bottom of the holders. After they were sprayed and while I waited for them to dry, I moved back to the garden stool.  The garden stool took two thin coats and it is now ready for whatever I decide to do with the top.
I now moved back to the candle holders and finish spraying the top side.
I used 1 1/2 cans of spray paint that cost 6 bucks for 2 cans.

Tomorrow we get started on the cast iron bench.  I would like to have it all prepped, painted, and the back wood frame assembled so when R goes to the nut and bolt store on Monday for stainless bolts/nuts etc, we can then assemble it and measure for the wood slats.

It is suppose to be very hot tomorrow so we will hang out in the shade and drink a lot of ice capps from Tim Horton's.

Reuse Repurpose Recycle

Don't forget to follow Gear Acres on

Pinterest

Tuesday, June 5, 2018

Concrete Solar Lamp

I just finished sending in my entry for the Quikrete 1 Bag Wonder contest.  I really enjoyed the process and because of this project I now have several other ideas.
I chose to make a solar lamp using only concrete, a solar light, and items found around the house to make the molds to form the concrete lamp.  It took me a while to find something to form the shade but when I saw the old stainless bowl in the barn loft the light bulb went off and I was now ready to mix some concrete.

The stainless bowl was perfect but I needed to make a hole in the top of the shade to hold the top portion of the solar light.  I used a small paint can hot glued to what would be the top of the lamp.
The mix that I made was stiffer than normal because I needed it to stand on it's own after a short period of time.  I kept pressing and forming until it set up.  I left it alone until the next day when I flipped the bowl over and tapped with a small hammer.  It easily came out because I sprayed the inside of the bowl with coconut oil.
I sanded the edges of the shade before the concrete was fully hard.  The sand paper I used was a medium grit and just took off the sharp edges and slightly rounded the edges, too.
I used PVC pipe to form the body of the lamp and used old throw away food containers to form the two rounds.  The rounds were brushed while under running water to expose the aggregate so that the lamp had two textures.  The rounds were heavily textured and the body of the lamp was very smooth.
Assembly went as followed.....bottom of lamp was a round, then the body of the lamp, then the round with a hole in the center, followed by the bottom portion of the solar light including the stake, then the shade set on top of the glass portion of the shade, and finally the top of the solar light was set into the center hole of the shade.  Eventually the pieces will be glued together with landscaping adhesive.  The lamp is steady without it but better safe than sorry.  I would hate for someone to accidentally bump into it and have it fall on a toe.
 The total cost for this project was $8.59.  $3.10 for 60lb bag of Quikrete + $5.49 for solar light.
The molds were all made out of items I already own.  I also think that I have enough Quikrete left to make a second lamp. 

Now on to the next project.

Reuse Repurpose Recycle

Don't forget to follow Gear Acres on

Pinterest


Friday, May 4, 2018

The First Hosta Purchase of the Year

I had not intended to buy any hostas today because I was at the garden shop to buy geraniums.  We were on our way to the cash register when my eye caught what looked like hostas in the next greenhouse and the hunt for a new hosta was on.
I have over 300 different varieties of hostas in my garden so I am happy to find just one that I don't already own.  I walked along the first row saying "Got it. Got it. Got it. Got it." I'm thinking "bummer" as I started down the next row.  I am about 5 plants from the end of the last row when I scored gold and that gold would be in the form of Saint Elmo's Fire. 
Then I scored again with Fragrant Blue.  I already have 3 or 4 from the Fragrant line and they have everything that I like to see in a hosta.  The flowers are white and fragrant and they have thick leaves.  But this one is different in that it falls into the 'small' size category where as all my other Fragrant line hostas are tall and fall into the medium/large to large size category.  

Hostas come in all sizes.  From smallest to largest is miniature, dwarf, small, medium, large, extra large, and giant.  The smallest hosta that I have in my garden is Pandora's Box and the largest is the giant size Empress Wu.  

Buying hostas that stay small and short is what allows you to layer your hostas.  There is nothing more striking than to have a tall blue hosta with a small short yellow hosta just ever so slightly tucked underneath the taller blue hosta.  This combo will make the blue appear bluer and the yellow will pop even in deep shade. 
 I was so excited about finding these two that I forgot to put a 3rd hosta in my cart.  So tomorrow I will head back and buy 'Barbara Ann'. 

Just in case you haven't read any of my other posts on hostas and want to catch up, just type in HOSTA in the search bar at the top on the right side.

I snapped a couple of photos to show you which hosta to buy when you have the option to choose between two of the same hostas.

In the photo above of the hosta 'Barbara Ann', you can see that there is just one stem.  There is nothing wrong with buying a single stem plant BUT if you can find a multi stemmed plant like the one below,  you then can divide the plant before you put it in the ground.  I wrote a detailed post on how to divide hostas several years ago so if you need info on how to divide, you can find that by using the search bar on this blog.
Why divide before you plant?  I think the number 1 reason is that it is far easier to divide a small plant then it is to dig up a large, heavy plant and try to divide it without damaging the plant.  Hostas are hardy plants and can take a lot of abuse.  But my back can't handle the abuse of lifting a heavy plant out of the ground and then try and divide that plant into multiple plants.  

The number 2 reason to divide a plant before you put it in the ground is that it lowers your per plant cost.  If you buy a plant for $19.99 and you can divide it into 4 plants then the cost per plant went from $19.99 to 5 bucks per plant.

The hostas today cost $8.98 each and had I been able to find one with two stems, it would have lowered my per plant cost to $4.48 each.

My cousin Judy is responsible for my hosta addiction and until I saw all of her different hostas, I thought all hostas were green.  How little did I know back then that hostas could be green, blue, yellow, and white and any combination of those colors, even within one leaf.

If after reading my posts on hostas and you find yourself with a hosta addiction, don't blame me.  Blame my cousin Judy.

Reuse Repurpose Recycle

Don't forget to follow Gear Acres on

Pinterest


Sunday, April 29, 2018

Small Shutters and Raking...

...so much raking.
 All the shutters are hung on the garden shed.  I even painted the frames of the 3 screens.  We need to build a 4th screen for the last window and when we get caught up with all the spring raking we will make one.
Today we discussed that we need storm windows for the shed to keep out the cold wind in the winter. This is more than a garden shed.  In the basement of this shed is the pressure tank for our well.  Because it is below grade it stays above 32 degrees unless the weather is brutal.  So we figure that if we have spray foam insulation in the walls and storms on the windows we should be fine with just heat tape on the pipes.  Normally the heat tape doesn't kick on until the pipes are close to 32 degrees.  If we can keep it at 40 degrees then the heat tape will never come on and will not use any electricity.

We also replaced two broken panes.  All 4 windows need to be reglazed and the paint stripped off the wood parts and repainted.  This is something that I can do one window at a time during the summer while we hang cedar shingles.

The trash pick up guys will probably not be happy with us tomorrow.  We put out 20 trash cans full of leaves.  We need to blow the leaves out from around the lilac bushes out by the street and then we will be done with that area.  R fertilized because it started to sprinkle and rain was in the forecast.  So far....no rain.

Spring clean up is one of my least favorite chores that we do.  But one of my favorite chores is mowing the yard for the first time every year.  Something about the smell of the cut grass and turning the semi green lawn scattered with leaves and dead grass into a nice green lawn is so rewarding.

But by the end of June, lawn mowing has lost most of it's luster and it is just another weekly chore.  Really it is just like any other task that you do that is the same day in and day out.  Like painting your entire house....by the third gallon of the same color it becomes monotonous.  

Some people do one job at a time rather than multiple tasks at various levels of completion all going at the same time.  We are of the latter because we have to work around the weather, finding parts for various projects, and working around the budget. 

So here is what is currently happening or going to happen in the near future. 

Finish the raking
Buy plants for the pots and window boxes
Take the outdoor furniture cushions to upholsterer for new fabric
Build a peaked roof on the almost flat roof on the back of the house (probably hire this out)
Remove third chimney (not in use) need space and don't need the chance of a roof leak
Have chimney repair guy rebuild or repoint the two chimneys that are for the three fireplaces
Power wash the two chimneys to remove the pale yellow paint
Have retaining wall built and patio pored with exposed aggregate 
Remove old cedar shingles off the back of the house
Strip old paint from windows and trim on the back of the house
Fix any broken or missing sheathing
Install new cedar shingles
Order and install the last two windows that need replacing with restoration windows
Order custom sized exterior french doors for the master bedroom  
Build Juliet balcony off of master bedroom
Remove old garage door under the deck and close it off
Move basement door to where garage door was & install original house window where the door was
Paint house and barn
Work on two secret projects 

Whoa....I need a nap after reading that list.  But like everything else that we do, we will do it one step at a time and make sure we do it right so we don't have to re do it in 5 years.

Reuse Repurpose Recycle

Don't forget to follow Gear Acres on

Pinterest

Thursday, April 19, 2018

Board and Batten Shutter Tutorial Part 6

Board and Batten Shutter Tutorial Part 5

Shutter dogs are the apparatus that hold an operating shutter in the open position.  My shutters do not move but if they did open and close, I would need something to hold them open.  Without anything to hold the shutter open, it would bang and slam the window casing whenever the wind blew.  
Our intent is to make the shutters, that we built, look as close as possible to operating shutters.  You are probably wondering why we just didn't make them operational.  We have storm windows and the area where the storm window sits is the exact location where the shutter would be if the shutter was in the closed position.

I purchased vintage wrought iron shutter dogs but you can buy new wrought iron shutter dogs and even plastic shutter dogs and pull rings for vinyl shutters.  So if you like the look but have vinyl shutters and thought you couldn't get the look of operational shutters then you are in for a surprise.  Search for vinyl or plastic shutter dogs and ring pull on the Internet.

The shutter dogs that we used have 4 parts.  The S shaped scroll, the long lag screw, cotter key, and a washer.  You will need to decide before you assemble them whether you want the bottom scroll to point away from the shutter or towards the shutter.  I chose the option of the scroll to face away from the shutter and assembled the shutter dogs so the large scroll when on the bottom scrolled away from the shutter.  

The larger scroll is on the bottom.  This is because the larger scroll would weight more than the small scroll and stays put on the bottom due to gravity.  If you put the small scroll on the bottom, your shutter dog over time could flip or at the very least move.
I will hand paint the screw head and washer after they are installed.  If I painted them before installation the paint would get chipped off during installation. 

The lag screw has a square 4 point head.  Your first inclination might be to screw the lag screw in using a crescent wrench or open end or box end wrench but the easiest and fastest method is to use a 12 point socket and a ratchet.  I used a 15mm 12 point socket.


The location of the shutter dog is where ever you want to put it.  But generally speaking it is usually found on the bottom corner or mid way on the outside length of the shutter.  We chose 4 inches in from the bottom outside corner and 1/2 inch below the shutter.  We drilled a pilot hole slightly smaller than the diameter of the lag screw.

Screw the lag screw in and stop when the scroll is resting against the shutter.  To keep your paint job from being scuffed just hold the scroll in the desired position as you screw it in.
Lag screw not fully screwed in.

 Window 'before' board and batten shutters and shutter hardware.
 Windows 'after' board and batten shutters and shutter hardware installed.
South  window 'before' board and batten shutters and shutter hardware. 
South windows 'after' board and batten shutters and shutter hardware installed.
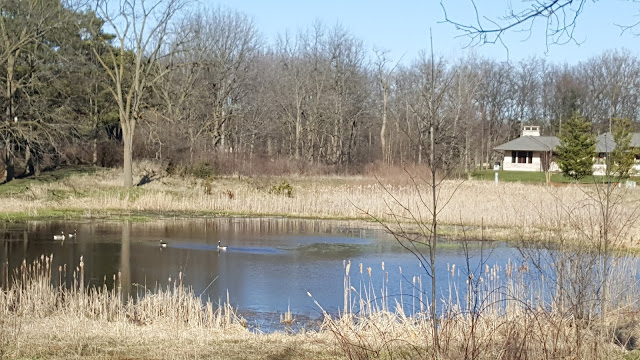
Brisk spring afternoon on the pond.
Today, I also painted all the small shutters for the garden shed.  We will install those shutters tomorrow.

Reuse Repurpose Recycle

Don't forget to follow Gear Acres on

Pinterest


Monday, April 16, 2018

You Never Know What is Behind That Board....

...until you remove it.

I feel like I'm beating a dead horse but because the weather is not cooperating, we have not been able to do anything outside since last Wednesday when the tree trimmers from Precision Tree and Shrub trimmed our trees.

I was able to get one top coat on the two pairs of shutters for the library windows on the front and south side of the house.  I really want to get these shutters hung before the paint gets bumped or scratched while they are in the game room/current work room. 

We have two projects that we are going to build and use outside.  I have all the parts except for the wood, but our scrap wood pile is so depleted that we are at a standstill until I find the right size wood for free.  Then two days ago, I found that wood right there above the current scrap wood pile of 1 by lumber.  Our 2 by scrap lumber is stored in the barn and R is guarding that lumber like it is gold.  Don't get by his stash....LOL   
But back to the new found scrap lumber.  While we AGAIN looked through the 1 by pile, I just happened to look up and a light bulb went off in my head.  Isn't it weird how you can just overlook something that is right in front of you?
Above our heads was what I thought was a faux boxed in beam.  Why I thought it was faux/fake was because there were fake beams just like this one in the kitchen before we removed them.  This fake beam was constructed of true 1X6's.  Three very long 1X6s.  These 3 boards will make both of our projects.
R was thrilled that I wasn't going to change my plans and make the two projects out of 2 by lumber. We got out the ladder and a Wonder Bar and started prying and prying and prying.  The euphoria was slipping away very fast.  We pried a small slit of an opening so that R could get a cutting wheel in there to cut the nails.  Finally when enough nails were cut, we could finally see inside the faux beam and inside the faux beam was a real steel beam.  Oh crap.
This is how projects on old houses spiral out of control.  Every piece of drywall or plaster or wood that you remove, could reveal either horror or nothing.  Kind of like Schrodinger's cat.  Until you remove the board, what's behind the board can be both a horror or nothing at all.  Remember when we removed the old shingles on the east side, only to reveal another layer of shingles with live wires stapled to them?  We expected nothing at all but instead we found a horror.
We will not know how to fix this metal beam problem until we remove the plaster and drywall ceiling so we can see the entire picture.  But right now we just want those 3 pieces of wood.  Of the two projects, one can wait but the other is time sensitive and I need to build it before June 21st.  

Only one board has been pried loose because the other two boards are held in place by plaster on side and drywall on the other.  So tomorrow we will try and get another board down after we hang the two sets of shutters, if there is time. 

Reuse Repurpose Recycle

Don't forget to follow Gear Acres on

Pinterest